HiFinance
5
SECTION 0 - GETTING STARTED
Now that you have received your copy of HiFinance,
what do you do? How do you operate this accounting system? How do you load the
programs? How do you set the operation of the system to suit your company? This
section discuses these topics and helps with the
smooth installation of HiFinance.
It
is beyond the scope of this manual to introduce a novice user to the basic
operations of a computer or accountancy. It is assumed that your dealer has
already shown you how to operate your computer, how to get around the keyboard
and the basic fundamentals of MS-DOS and Windows. If not, you will have to read
your MS-DOS or Windows manual. Also, there are several excellent texts and
programs that teach a novice user basic computer literacy.
In writing this section it has been assumed that
your company name has been installed into your copy of the programs. If this
has not been done, please contact your dealer. We also assume that there is
enough room on your hard disk to accommodate the programs. If your hard disk is
not DRIVE C:, then replace C: with the appropriate letter. On most
networked systems, HiFinance is installed in DRIVE H:.
This can either be a named drive or a defined path. It is usually more convenient
to name the drive H: using one of
the tools available within Windows. In this manual, we will assume DRIVE H:.
HiFinance is not “shrink-wrap” software. The
programs are normally installed by Horizon Information Systems, or one of their
agents. There is normally no installation disk. There are, however, some
parameters that can be adjusted in the operating system. These are operating
system dependant. Differences between various version of Windows demand certain
settings need to be made in some that are automatic in others.
First Step: READ
THIS SECTION RIGHT THROUGH !!!
INSTALLING ON
MS-WINDOWS
One machine in your network will be the HiFinance
Server. Normally all paths lead to a drive H: on this machine. It is
possible to make every machine see the main directory of the server as H:, even the
server itself. This will make installation much simpler. Drive H: may,
though, be a shared directory on the server, as long as is accessible to all
users.
All system and language programs are setup in a
directory called BASE. This is normally a sub-directory off the main
drive or H:.
Similarly, all HiFinance programs and scripts are in a directory called HF5PROG.
All data files are in HF5DATA. Each company is setup in a sub-directory
within HF5DATA. The naming convention for company directories is often COMP1
for the first company, etc. or an abbreviation of the actual company name, eg HIS for Horizon Information Systems. Each user,
is creates a sub-directory under the company sub-directory. Their temporary and
control files are placed there. Eg. Arthur working in Horizon Information Systems would have a
working directory H:\HF5DATA\HIS\ARTHUR .
When the loading process is complete you will have
to check that certain parameters are correctly set on your computer. Although
the old versions of Windows are not often found, to run, HiFinance on MS-DOS or
MS-WINDOWS 3.X or WINDOWS95, you must have enough buffer
and file space. Make sure that your CONFIG.SYS
contains the lines:
FILES=99
BUFFERS=40
If you are using Windows XP, or above, you may, or
may not, have to set these parameters. Windows 2003 server and above usually
requires the parameters to be set. However, with these versions of Windows, the parameters must be set in a special file: C:\WINDOWS\system32\CONFIG.NT.
Here you have to add the following lines, to the bottom of the file:
country=061,,%SystemRoot%\system32\country.sys
dos=high,
umb
device=%SystemRoot%\system32\himem.sys
files=99
The only really important line is the last one, and
sometimes these lines already exist. It is a matter of checking the exact
version, and release date, of your copy of Windows.
In older versions of Windows, if your computer has
several parameters set by other programs, eg. CD-ROM
drivers, you might find that HiFinance will start with one or more messages
stating that you are out of string space. This is rare, unless you have many
other background processes that you have installed, but if this happens, add
the following line into the CONFIG.SYS
(or CONFIG.NT – see above):
SHELL=C:\COMMAND.COM C:\ /E:1024 /P
Please remember that if you change the CONFIG.SYS
file, you will need to reboot your computer to affect the changes.
Note that this is rare in later versions of Windows
as the “string space” is allocated dynamically.
If the number of FILES allocated is not set to at least 40, the results will be
unpredictable. See also the comments in SECTION 000 regarding the number of file buffers.
NOTE: If you are running on Windows 98, XP or WIN10 or above, most of the
configuration is dynamically handled by the operating system, so the CONFIG.SYS
and AUTOEXEC.BAT normally do not need
modification.
The GO.BAT program starts HiFinance.
As part of the initialisation, the program path set to include the program
directories (i.e. \HF5PROG and \COBOL\EXEDLL or \BASE etc.). If you are
using HiFinance in a purely DOS mode, move these to your AUTOEXEC.BAT,
otherwise restarting GO.BAT repeatedly will cause your computer to run
out of string space. If you are starting HiFinance from a shortcut, this is not
an issue.
The standard GO.BAT is setup to run from DRIVE H:. This is consistent when running
multi-terminal installations. To make HiFinance run on multi-terminals, you
must define the server (the computer with the programs and data) as a drive.
You should also define the server back to itself, as DRIVE H: if you wish to use it as a terminal. The procedure for
doing this is different for different versions of Windows. Please refer to your
dealer for instructions.
STARTING HIFINANCE.
From a DOS window:
Open a DOS window. In Win98 or lower, use START/PROGRAMS/MS-DOS. In WIN-ME or WIN-2000 and above, use START/PROGRAMS/ACCESSORIES/MS-DOS or START/PROGRAMS/ACCESSORIES/COMMAND. You can also use START/RUN/COMMAND but this can bring in one of several shells.
The previous options always bring in the correct one.
To start HiFinance, firstly make sure that you are
in the correct directory. The installation routine will have left you in the HF5PROG directory, which is the correct
starting directory for a single-user installation. If you have had to re-boot
your system, or are for any other reason not in the correct directory, type the
following instruction from the DOS prompt.
CD
\HF5PROG <Enter>
This will cause MS-DOS to change to the correct
directory.
Next type:
GO
STARTHF5 COMP1 USER01 <Enter>
This will initiate the OPTIONS MENU, which is described below.
It is possible to automate the function just
described, by adding the two lines to the end of your AUTOEXEC.BAT file.
From Windows:
For installations on Windows 95 or above, HiFinance
is normally setup and started via icons on the desktop. Typically, the shortcut
should contain the command \HF5PROG\GO.BAT
STARTHF5 COMP1 USER01, where COMP1 is replaced by your actual
installation’s directory and USER01 is a unique name for
each user.
STARTING
HIFINANCE
To start HiFinance, click on the Desktop Icon.
The first thing that your computer will display is
the USER-CODE entry routine. This
function enables HiFinance to identify you and initiate your screen, printer
and path attributes. The USER-CODE
is a string of up to 10 characters. It is usually your name, or the name of
your department. If you have just received your copy of HiFinance, the only
user code available will be SUPERVISOR.
This must be entered in upper-case characters unless your site has been
installed with special option that ignores case in passwords. This is option
must be specified when HiFinance is initiated and cannot be changed without
reference to Horizon Information Systems.
Type the word SUPERVISOR
in the space provided and press <Enter>.
If you misspell the USER-CODE HiFinance will display an
error at the bottom of the screen. In this case, press <ESC>
and re-enter your code.
Having entered a valid USER-CODE, you will be asked for a PASSWORD. This is a string of up to 8 characters. It is specific
for your USER-CODE. The USER-CODE and PASSWORD are a pair and must be both
entered before HiFinance will allow you access to any functions.
THE
SUPERVISOR’S PASSWORD
The SUPERVISOR’s
password is normally kept secret and is only known by a limited number of key personnel.
To install HiFinance you will need to know it. This information is available
from your dealer.
The SUPERVISOR’s
password is a very important piece of information. It is recommended
that you change the SUPERVISOR's
password to a new one that only your key personnel know, but don't loose it. Changing passwords is described in SECTION 7.1.4 of
this manual.
The SUPERVISOR
is the master user. This USER-CODE
allows access to all facilities within HiFinance. For security reasons,
it is normal to create a USER-CODE
for each person who has permission to use the system. Each user has a separate PASSWORD. Each user can change their PASSWORD and should do so on a regular
basis. The SUPERVISOR may change any
PASSWORD as well as assigning and
disabling USER-CODES. If a user
forgets their PASSWORD, the SUPERVISOR can assign a new one for
them. If you forget the SUPERVISOR's
PASSWORD, you will need to contact
your dealer for instructions. There is no simple way to assign a new PASSWORD to the SUPERVISOR unless you know the current one. Make sure that you keep
the SUPERVISOR’s PASSWORD in a safe
place.
ENTERING
THE DATE
Having successfully entered a PASSWORD, the screen will clear and display a date. This will
normally be today's date, but if your computer is not set correctly, or you
wish to change the date. Enter the new date or, simply type over the day
portion of the date. In either case, press <F10> to continue. (Entering the
date is further described in SECTION 7.4.) The date may be entered in a number if
formats and can be made to display in a number of formats. For further details
see the GENERAL
POINTS ON DATE ENTRY further
down in this section.
The date normally defaults to the computer’s date
and in most installations, it is not specifically asked for at
startup. This can be changed by the SYSTEM DEFAULTS, as described below.
THE MAIN
MENU
HiFinance will now display the MAIN MENU as follows:
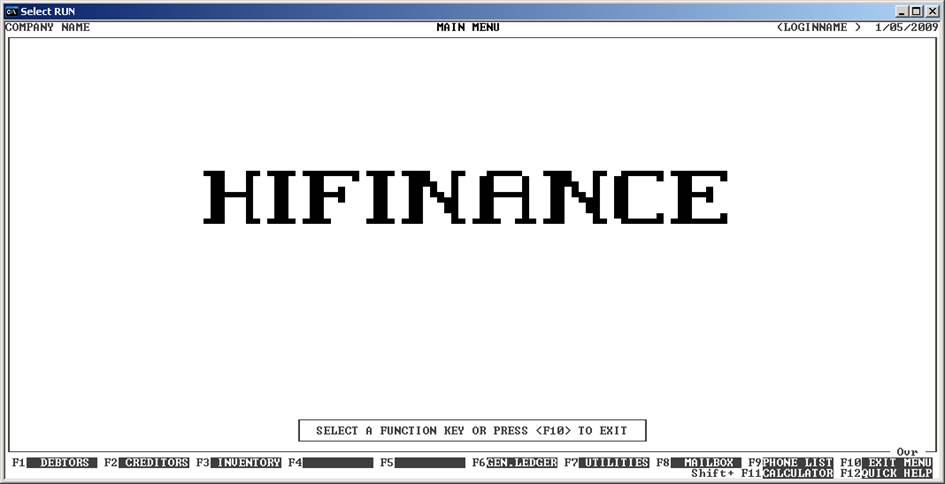
There
is normally a logo in the centre of the screen. This is either the default logo
or a customised one created for your company.
The MAIN MENU is the top of what can be imagined
as an inverted tree. It leads to other menus, eg. DEBTORS, CREDITORS, etc. These are fully described
in their respective sections. For installation purposes, we will mainly be
looking at the UTILITIES MENU. The options are printed on the
bottom of the screen, eg. DEBTORS, for Debtors, CREDITORS, for Creditors, GEN.LEDGER, for General Ledger, etc. To move around the menu
structure in HiFinance, it is only necessary to press the number next to the
option you wish to activate. To move to a specific branch of the menu you can
press the corresponding function key, eg. to move directly to the Debtor branch, you can press <F1>. This is further described later in this section.
For the present we will not refer to function keys on
the MAIN MENU.
THE UTILITIES
MENU
Press the number 7 or <F7>. (No <Enter> is needed.)
(If you are reading this manual without using your
screen at this point please turn to SECTION 7 of this manual. The current section refers to
various sections from 7 onwards and
it is worth skimming through them before proceeding.)
The screen will change to display the UTILITIES MENU. This will be displayed in the middle of the top of your
screen. In fact, HiFinance always shows you what is happening by displaying the
program or menu option on the top of the screen.
ENTERING
YOUR COMPANY’S DETAILS
From the UTILITIES
MENU press the number 1.
The screen will now display the SYSTEM MENU. It is here that you will set-up certain options that
will make HiFinance work smoothly in your company.
Press 1.
You should now be in the COMPANY DETAILS option.
This is where you enter the address of your company’s as you would like it to
appear on receipts, statements, etc. There is also space for an overall
comment. This is for your statements. Whatever you enter in this space will be
displayed on the bottom of each invoice. It may read “Payment required within 7
Days” or anything else you desire. The width of each field is defined by the
square brackets. To move to the next field, press <Enter>, <CsrDn> or <Tab>. To return to a previous
field press <BackTab> or <CsrUp>. If you press <ESC>
at any time, the SYSTEM MENU will
reappear but no update will have occurred. If you have a mouse attached to your
terminal, and HiFinance recognises it, a rectangular block will appear showing
the current mouse position. To move the cursor using the mouse, move the mouse
pointer to the desired point and press the left button once. Note that it is
only possible to move the cursor to valid input fields. If you press the mouse
button when the pointer is not on a valid input field, the computer will beep
and the cursor will not move.
To finish off this screen press <F10> or press <Enter> past the last input field.
At the bottom of the screen, you will be asked:
OK
TO UPDATE? (Y+/N-)
This prompt may be answered will a Y or y or + if you are happy with the information that you have just entered or a N or n or -, if you are not. The COMPANY DETAILS function is further
explained in SECTION
7.1.1.
After exiting from the COMPANY DETAILS function (using <ESC>), HiFinance will return you
to the SYSTEM MENU.
SETTING THE
SYSTEM DEFAULTS
From the SYSTEM
MENU Press 2
The appropriate program will load into the
computer's memory and a number of questions will appear. A full explanation of
each question is given in SECTION 7.1.2. Please take the time to look through that
section before proceeding. If you have any problems with these options, leave
them and try to put through a few transactions. Then, if there is something
that you do not like, or do not need, return to this function to rectify the
situation. If you still have problems, contact your dealer.
The SET
SYSTEM DEFAULTS screen will not end at the bottom of the page. It will, in
fact, go to a second page when you press <Enter> on
the last question. There are several pages of questions and it is possible to
move through the pages by either using the <PageUp>, <PageDn> keys or by pressing the
corresponding function key. The program will not however let you leave a screen
unless you have answered each field with a valid response. After you have
completed the last page, <F10> is available for you to
instruct the computer to save your changes. After pressing <F10>, HiFinance will respond with the question
OK
TO UPDATE?
To actually force HiFinance to update its files, you
must answer this question. If you press <ESC> at any time, HiFinance will
return you to the SYSTEM MENU without
updating its control files.
Return now to the SYSTEM MENU by pressing <ESC> or completing the questions
and pressing <F10> to update.
If you wish to establish new USER-CODES (other than SUPERVISOR,
which you are currently logged-in as) press 4. For full details regarding
this function, refer to SECTION
7.1.4. When you have finished entering USER-CODES, press <ESC> to return to the SYSTEM MENU.
SETTING-UP
YOUR PRINTERS
You should now be back in the SYSTEM MENU.
Press 5
This will change the screen to display the CONFIGURE PRINTERS MENU. This function
is discussed fully in SECTIONS
7.1.5. You will only need to enter this option if you have an unusual
printer type. Most printers commonly available in Australia are pre-defined in
the system.
From the SYSTEM
MENU press 3 and then 1.
This function allows you to assign your local
printers. The function is fully described in SECTION 7.1.3.1. If you have multiple
printers attached to your system, you might wish to assign different functions
to different printers, eg. Cheques might be printed
on a different printer to the reports printer. This function allows you to do
this. If you only have one printer, you will probably not need to adjust
anything here.
CHANGING
COLOURS & GRAPHICS
HiFinance comes with a default colours scheme. If
you wish to change the colours HiFinance uses on your screen, you can
enter the COLOURS & GRAPHICS
option by pressing 2 from the USER DEFAULTS MENU. This is fully
described in SECTION
7.1.3.2.
CHANGING
PATHS
Unless directed by your dealer, do not attempt to
enter or change any information in the CHANGE
PATHS function.
When you start HiFinance for the first time, you
will be asked for the directories used by your installation. If you rearrange
your disk, you might need to change some of the directory pointers here.
Otherwise, leave this screen alone as a setting the parameters incorrectly will
stop HiFinance from functioning.
PRINT
MANAGER
As you have not yet started to print, the last
function, PRINT MANAGER, is not
relevant at this point. This function is, however, fully described in SECTION 7.1.8.
TABLE
MANAGEMENT
By now you should have set-up the address of your
practice; the screens, printers and any passwords. Before commencing work on
HiFinance it is still necessary to set-up the Debtor, Creditor and Inventory
Groups, etc.
If you are still in the SYSTEM MENU, press <ESC> to go back to the UTILITIES MENU and press 2 for TABLES.
CREATING
LOOK-UP TABLES
From the UTILITIES
MENU we will create the DEBTOR
GROUPS, CREDITOR GROUPS, INVENTORY GROUPS, etc.
Press 2.
(Tables)
The screen will now ask which table you wish to
update. By pressing a number from 1 to 8, you can enter the maintenance options for any of the tables. A full
explanation of this area can be found in SECTION 7.2. onwards. You might
decide to leave this section for later but it should be noted that it is
imperative that you follow these sections at some stage as it is not possible
to add a Debtor until there is at least one Debtor Groups. Similarly for
Creditors, etc.
If you press <ESC>
in the UTILITIES MENU, HiFinance will return
you to the MAIN MENU.
SETTING-UP
YOUR BANK ACCOUNTS
From the TABLES
MENU, press 6. You should now be in DEPOSIT
SLIP DETAILS. You only need to update the fields here it you intend to
print Bank Deposit Slips. This is fully discussed in SECTION 7.2.6.
*** BACK-UP YOUR WORK NOW ***
Because you have probably spent the best part of an hour entering information, you should NOW protect yourself by performing a BACK-UP of your data files. Your dealer
should already have explained the importance of the BACK-UP but as it is so essential we will reiterate: -
BACK-UP IS A
SECURITY PROCEDURE THAT COPIES THE INFORMATION ON YOUR SYSTEM TO ANOTHER SET OF
DISKS OR TAPES. HAVING A CURRENT BACK-UP OF YOUR INFORMATION ENSURES THAT NO
MATTER WHAT HAPPENS TO YOUR SYSTEM YOUR VALUABLE DATA WILL NEVER BE TOTALLY
LOST. WE CANNOT STRESS TOO STRONGLY THE IMPORTANCE OF MAINTAINING FREQUENT
BACK-UPS OF YOUR SYSTEM.
The procedure for this depends on the kind, and
configuration, of computer you have. If you do not already know how to make a BACK-UP, it is extremely important that
you ring your dealer, NOW and
find out.
To use the BACK-UP
facilities supplied with HiFinance you simply need to exit from HiFinance by
pressing <F10>. This will return you to the
OPTIONS MENU. From here, choose the
option BACK-UP TO FLOPPY DISK (3). This will give you a permanent BACK-UP
of the data you have entered to date. If you are using some other backup
facility, eg tape, now is a good time to try it out.
INSTALLATION COMPLETE
HiFinance is now set for use. If you have managed to
get this far, you should have a fair feel for the way HiFinance functions. From
here on, it is simply a matter of adding DEBTORS,
INVENTORY, CREDITORS and/or GENERAL
LEDGER ACCOUNTS as needed. The method for doing this is described in SECTIONS 1, 2, 3 and 6 of this manual, respectively.
Remember: DEBTOR
TRANSACTIONS cannot proceed before you add some DEBTORS and some DEBTOR
GROUPS, etc. Similarly, CREDITOR
PURCHASING cannot proceed before you enter some CREDITORS. Read the sections relating to these functions and you
can start processing.
GENERAL
COMMENTS ON HIFINANCE SCREEN FORMATS
All screens in HiFinance have a banner on the top
line that consists of your practice name; followed by the process or menu
option effective; your currently logged-in user-code in brackets and finally
the current date. HiFinance uses lines 3 to 23. These lines are enclosed in a box
or frame, which might also have a sub-function embedded in the top line. This
framed portion of the screen is your data-entry area. Here, information is
displayed and you may add or modify information where appropriate. The last
line on the screen is reserved for the display of function keys, error messages
and update/cancel questions. When available the mouse prompt will appear as a
reverse coloured block. (The mouse is normally not functional in Windows unless
you run the program in full screen or use the “exclusive” mode.) The mouse may
be used to move the cursor to an input field during update programs and may be
used to scroll the screen in display and enquiry programs. Whenever the
function keys are displayed, <sF12> is available for the
display of help. This help is a single screen describing the current function
and the options available. <sF12> is activated by pressing
the <F12> key while pressing the <Shift> key.
The primary menu requires you to press a number from
1 to 7, or the corresponding function
key, to start a branch, eg <F1> enters the DEBTOR
branch. From here you can refine your choice. The available
sub-branches are displayed on line 3. Choose a function by pressing a number.
The options are normally ENQRY for enquiries, MAINT for maintenance, TRANS
for transaction entry, RPRTS for reports, UTILS for utilities. Some
branches have different options, eg the Utilities
branch. Unless, there is only one option, pressing a number here will open a pull-down menu box. There are never more
than 9 options on any menu box so that single key entry is possible. Wherever
possible, if a single character answer is required, the computer will respond
as soon as the answer is entered (with no <Enter> required). You can also
move up and down a box by using the cursor keys. Moving left and right is also
possible. By the use of cursors and numbers, you can quickly move to the
function you require. This function will immediately initiate a program that
will have its own screen structure. When this program finishes, you will be retuned to the same position on the menu you just left
from. To restart a program you thus just have to press <Enter>.
Normally, every screen has the facility to enter
help, mail the phone directory and calculator functions. Help is available via <sF12> as described above. Mail, Phone and Calculator are available through <sF9> and <sF9> and <sF11>, respectively. In the MAIN MENU, Mail and Phone are available via <F8> and <F9>, only. Accessing Calculator
by this method brings up a temporary version that does not store the result.
Some programs offer <F9> where appropriate to allow
you to bring up Calculator in a format that stores the
result in the current input field when you escape. When this option is available,
<F9> is labelled CALC. (One point that should be mentioned here is that
on Windows Keyboards, Windows sends a <sF8> when you press the Windows
Key. There appears to be no way of stopping this behaviour. It is normally not
an issue.)
In most programs it is possible to press <sF1> though <sF7> to shell directly to the MAIN MENU. This will place you in the
menu branch 1 to 7 respectively. <sF10> will place you at the top
of the MAIN MENU. You can the start
a different program leaving the old one on hold. When you leave the second
program, the first will re-appear exactly where it was when you left. While the
second program is running, a reminder appears at the bottom of the screen. This
will take the form of X Task(s) pending. You can stack programs in
this way as far as memory allows, however 3 is about the practical limit.
When you have mail sent to you, the words Message Pending will appear at the bottom of the screen. To read
your mail, press <sF8> as described above.
<ESC> is used extensively
throughout HiFinance. In general, <ESC> will return you to the last
place you were, before you entered the current screen or function. <ESC> can be either an abort instruction (in operations
such as reports) or an exit instruction, eg. in menus, but it should always lead you to a logical point.
If the screen you are looking at is the first one in the program, <ESC> will of course cancel the program and return you to
the MAIN MENU.
In general, within programs, pressing <F10> will cause the current screen to be accepted and
processed. Where a single line of input is required, or at the bottom of a
group of input fields, usually <Enter> will also be accepted as
the update key. <F10> is hence becomes a quick
way to exit from a complicated screen if there are no more lines you wish to
enter. <F10> and <Enter> are also equivalent in search screens. Both will
accept the current line and insert it
into the main program. For further information regarding search screens, see SECTION 1.1.
The menu programs allow a special short-cut method
of jumping from one major branch of the MAIN
MENU to another. Function keys are displayed at the bottom of the screen.
Each major branch, ie each option on the MAIN MENU is represented by a function
from <F1> onwards, eg. <F1> for DEBTORS, <F2> for CREDITORS, etc. If you press a valid function key, the MAIN MENU will immediately skip to the
top of the branch you have chosen. An example of this facility is when you have
just returned to the menu program from entering a receipt and wish to go to the GENERAL LEDGER MENU. You could press <ESC> three times and then 6 or you
can more simply press <F6> once to achieve the same
result. New users, not familiar with the layout of the MAIN MENU will prefer to use the longer method,
however, experienced users can save many keystrokes by using the short-cut
method.
The data-entry frame, mentioned above, is broken
near its lower-right-hand-corner. Usually, Ovr is displayed. This denotes that the screen is
accepting data in the over-write mode.
Any character typed will over-write the current character displayed above the
cursor. If you press the <Insert> key, data-entry will change
to insert mode. Now the letters Ins will be displayed, and any
character entered will be inserted at the current cursor position. When the
current field is expecting numbers only and is greater than one character long,
the prompt may disappear altogether, as it is usually inappropriate. Note that
the delete key functions differently depending on whether you are in insert or over-write mode. Entering a character at the beginning of a field
normally clears the field to either blank for alphanumeric fields or zero for
numeric fields. If this is not what you want, move around the field with the
cursor keys first. This will automatically put you into an edit mode.
<ESC> is not available in the top
level of the MAIN MENU, where only <F10> will allow you to exit from HiFinance completely.
The reason for this is simple: since most keyboards have an automatic repeat
function unbuilt, if <ESC> worked all the time, you
could find yourself outside of HiFinance very quickly by holding your finger on
the <ESC> button for a second to
long.
<ESC> is also not available when
a YES/NO answer is
required as in OK TO UPDATE? (Y+/N-). In this case, <ESC> or <Enter> will just take the default
answer, if one is displayed.
Every time HiFinance asks for a YES/NO answer, it will display the prompt (Y+/N-). This is to remind you that Y, y, and + are equivalent answers. Similarly, N, n, and - are also equivalent.
Usually the + and - are on the extreme right of the keyboard making them easier to get to
than Y and N when you are using the
numeric keypad. Normally, only a single character is required to indicate YES or NO. However, there are exceptions. If your answer will result in a
major update to the system, or the removal of a file, eg.
End-of-Year processing, then you are asked to enter YES or yes, in full. In this case, the only other possible response is NO.
If you are using a colour monitor with HiFinance,
you will notice that the banners are yellow on blue; boxes and frames are
yellow; all fields that are displayed by HiFinance as headings are shown in
green and fields that you enter are normally in blue. Instructions from
HiFinance are in white; warnings displayed in yellow and errors are displayed
in red. These colours may be changed if desired, see SECTION 7.1.3.2.
FUNCTIONS
AND TERMS USED WITHIN HIFINANCE.
Within HiFinance, accounting periods are defined in
the calendar (see SECTION
7.1.6). These are normally defined by months and in accordance with
standard Australian accounting practices, period 1 is July. However, you can
override this by manually entering the end of period dates. There are 27
periods. 12 for last-year, 12 for this-year and 3 for
next-year.
In all
cases:
PTD refers to Period-to-Date.
This corresponds to the current accounting period, which is usually one month.
YTD refers to Year-to-Date.
This corresponds to the current accounting year that is usually the year
starting from June 1.
LY refers to Last-Year. This
refers to what would have been Year-to-date
last year (see above). Last year periods are always closed, that is, they
cannot be posted to.
NY refers to Next-Year. This
refers to what will be this year after you have run an END-OF-YEAR. Next year
periods are always open. They are provide as a buffer
for you to continue processing without forcing an END-OF-YEAR before all
Creditor and General Ledger processing is complete.
<CR> and <Enter> refers to Carriage Return or
Enter. These terms are interchangeable.
<F1> to <F10> refer to function
keys 1 to 10
<sF1> to <sF12> refer to the
function keys 1 to 10 while the shift key is pressed. <sF12> is normally used for the on-screen help function.
<ESC> refers to the Escape Key
<PageUp> refers to the Page-up key
<PageDn> refers to the Page-down key
<Ins> means insert mode
<Ovr> means over-type mode
<Home> refers to the Home key
<End> refers to the End key
<CsrUp> refers to the Cursor Up key, usually marked by an
arrow pointing up.
<CsrDn> refers to the Cursor Down key, usually marked by an
arrow pointing down.
<CsrLeft> refers to the Cursor Left key, usually marked by an
arrow pointing left.
<CsrRight> refers to the Cursor Right key, usually marked by an
arrow pointing right.
<Tab> refers to the Tab Key. It acts similar to <CsrDn>.
<BackTab> refers to the Back-Tab Key. It acts similar to <CsrUp>.
ASCII is an acronym, which stands for American
Standard Code for Information Interchange.
This is a
standard way of encoding characters when sending files between programs.
Virtually all computer programs accept this encoding. Although it is referred
to as ASCII, most files are actually
exported in a simplified CSV format.
(This is also an acronym which stands for Comma
Separated Values.) When exporting from or importing files to HiFinance
(except for special exceptions) HiFinance assumes that the fields will be
separated by a single comma and will not contain any imbedded commas. Thus,
numeric fields should not be presented to HiFinance as, 123,456.78. They should always be in
the format 123456.78. If you do not remove the commas from numeric fields, programs like
Excel will surround the field with quotation symbols and this will not be
interpreted correctly. Also, HiFinance will see 123,456,78 as two fields, namely 123 and 456.78. Quotes should be avoided in general (even in alphanumeric fields)
because, although HiFinance will store them correctly, many other programs will
not parse the output. If you are exporting from Excel, make sure that all
numeric fields are comma free and save the file as CSV format. HiFinance will accept negative fields with the sign
either leading or trailing. It will not interpret brackets or DB/CR formats, so these should be avoided.
ENQUIRY
SCREEN FORMATS
All Enquiries Screens have a similar format. They
all use function key extensively.
In general:
<F1> or <CsrLeft> moves to the previous record.
<F2> or <CsrRight> moves to the next record.
<F3> prints the master-file information.
<PageDn> is available to move to the next page of information if there
is one. If there is only one page of information for this record type, it is
usually assigned to the same function as <F1>.
<PageUp> is available to move to the previous page of information if
there is one. If there is only one page of information for this record type, it
is usually assigned to the same function as <F2>.
<F7> is used to display the transaction details, if there
are any.
<F10> is used to update the transaction or master-file
details.
<ESC> exits the routine.
DISPLAYING
AND PRINTING TRANSACTIONS
Transaction details are associated with several
master-files within HiFinance, eg. Debtors,
Creditors, General Ledger, etc. When transactions are displayed, a
highlight bar appears to show define the current transaction. You can move
around the list by either using the cursor controls or by using the mouse. Note
that the mouse is only available in DOS based systems where a mouse driver has
been installed. In Win9x you might also have to install DOS drivers, but often
Windows will do this for you. The screen generally appears as follows:
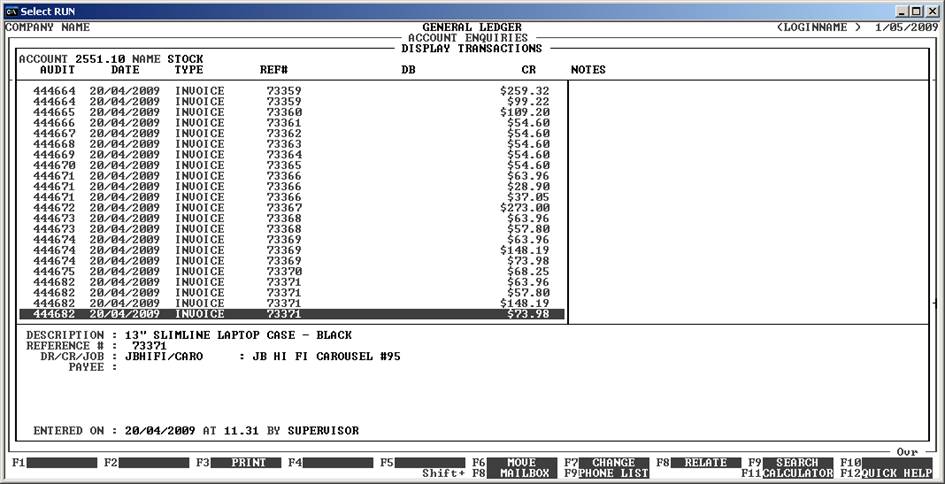
The above screen is from the General Ledger
transaction enquiries. Other enquiry screens are similar. One line is always
highlighted with a horizontal bar. This line is displayed in full in the bottom
block of information. The area at the right of the screen is normally reserved
for any notes you may have attached to the transaction. You may move around the
transaction file by clicking with your mouse or you can use the <CsrUp>, <CsrDn>, <PageUp>, <PageDn>, <Home> and <End> keys. There are also
several function keys available. Some are sub-system specific and are discussed
in the relevant sections. Others are general and are discussed here.
<F1> This option is available in
some screens (eg Creditor Enquires). Where available,
the function allows you to mask the screen output in defined ways. Usually, it
is the THEIR REF field. You can
enter a value and HiFinance will redisplay the screen, this time only showing
transactions that contain your chosen value. HiFinance checks to make sure that
there will be at least one line displayed. If not, it will show an error. To
return to the full list, there will be an option (often <F2>) the allows you to clear
the mask.
<F3> prints the transaction file. You are usually also
asked for a date range to print.
<F8> Allows you to find all the
other transactions that have the same transaction
audit number. Each time a transaction is initiated, HiFinance will
associate a unique transaction number to all the transactions created. <F8> will initiate a program that finds all these
transactions (irrespective of which transaction file they are in) and creates a
report. In this way, if you have a transaction on the screen, you can find out
what else happened at the same time.
<F9> initiates a search. The form of the search depends on
the type of file you are displaying.
<Home> moves to the start of the file.
<PageUp> If you are currently highlighting
the last transaction on the screen,
<PageUp> moves you to the top of the screen. Otherwise,
HiFinance will attempt to read one page back through the transaction file. If
this is not possible (because you are already displaying the first transaction,
there will be a beep. Otherwise, the screen will redisplay, leaving the highlight
bar in the same position.
<CsrUp> moves the highlight bar back one transaction.
<CsrDn> moves the highlight bar forward one transaction.
<PageDn> If you are currently highlighting
the first transaction on the screen,
<PageDn> moves you to the bottom of the screen. Otherwise,
HiFinance will attempt to read one page forward through the transaction file.
If this is not possible (because you are already displaying the last
transaction, there will be a beep. Otherwise, the screen will redisplay,
leaving the highlight bar in the same position.
<End> moves the display to the last transaction for the
current master-file record.
<ESC> exits the function.
SEARCHING
FOR MASTER-FILE RECORDS
HiFinance has many master-files. These files contain
the basic information for each file and certain running totals, which may be
displayed, or printed, on demand. Master-files include the Debtors, Creditor,
Inventory and General Ledger.
Each master-file record is accessed by a unique key.
If you know the key, HiFinance will display the record immediately. If you do
not know the exact key, HiFinance will usually offer you the ability to search
for the record you need. Use <F9> to initiate a search. When
searching for a master-file record, the function keys behave similarly to when
looking for transactions (see above). The main difference is that to accept a
code, you must either press <F10>, <CR> or double-click
the mouse.
PROCESSING
MASTER-FILES
Every Master-File (Debtors, Creditors, Inventory and
General Ledger) has its own ENQUIRY
function and MAINTENANCE MENU. The MAINTENANCE MENU always consists of the following:
ADD This is used to add new records, eg. new Debtors.
MODIFY This is used to modify information on existing
master-file records, eg. change
the name of a customer. These screens do not allow you to change financial
data. Financial data is backed up by transactions, which can only be entered
via DATA ENTRY menu’s.
DELETE This allows you to delete a record. Eg. you
might wish to delete a Debtor who no longer purchases from you. HiFinance will
normally refuse to delete a file that has non-zero balances or has
transactions.
Each master-file also has a TRANSACTION MENU. Eg. In the case of Creditors, this looks like:
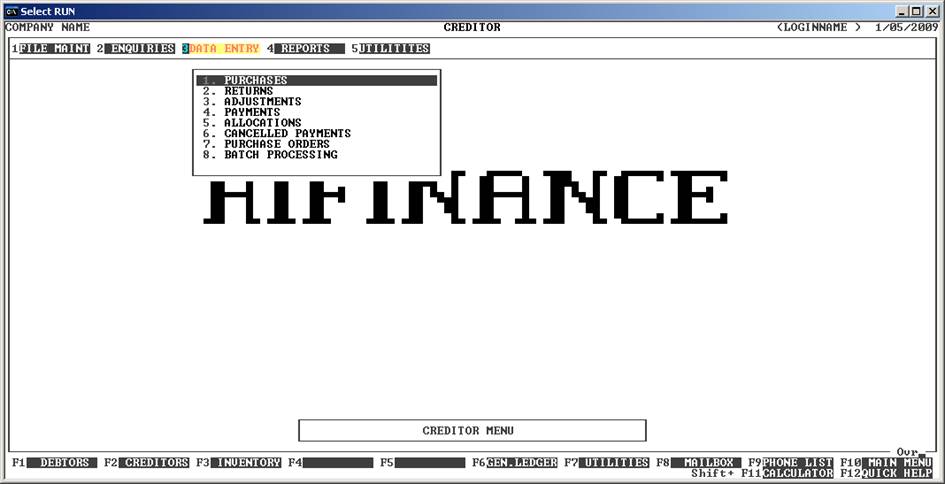
These refer to programs that enter transactions into the system. At the
same time as a transaction is entered, the corresponding master-file is updated.
In some cases, several master-files are updated.
Each master-file also has a REPORT MENU (sometimes two). From this menu you will be able to
initiate reports that collate information and print the results to the printer.
EDITING
ALPHA-NUMERIC INFORMATION
When you enter information into HiFinance, the
information might be strictly numeric, as in a dollar value, or it can be
alphanumeric, as in a name or address. Numeric fields will only accept digits
from 0 to 9, the decimal point, and the
plus and minus sign. Alphanumeric fields can also accept all letters of the
alphabet (in both upper and lower case) spaces and most special characters such
as asterisks and brackets. These are stored, as entered.
Several Control
keys are available when entering information into alphanumeric fields.
These are often a combination of the <Ctrl> key plus a letter. Eg <Ctrl>I is entered by holding down
the key marked <Ctrl> and pressing the letter I. In this case, it does not matter if the letter I is entered in upper or lower case.
The main
editing functions available are:
Some of the following functions are also applicable
to numeric fields.
<Ctrl>A restores the current field to what it was as you entered
it. Eg.
if a Client's name was Bloggs and you accidentally changed it to Floggs, pressing <Ctrl>A will restore the original name. This works only
until you leave the current entry field.
<Ctrl>B This is the same as <CsrUp> or <BackTab>. It returns you to the
previous valid entry field.
<Ctrl>F changes the case of the character under the cursor. This
means that if the character at the cursor is A and you press <Ctrl>F, the letter will change to a and the cursor will move on one position. Note that this only works
with alphabetic characters.
<Ctrl>I This is the same as <CsrDn>, <CR> or <Tab>. It moves you on to the next
valid entry field.
<Ctrl>K This is a special KILL command. If you press this key and
answer Y or y, HiFinance will terminate. This is a dangerous key to use, as it may
not let the programs update the files correctly. Although it is not a
recommended function, it is included here for completeness.
<Ctrl>M This is the same as <CsrDn>, <CR> or <Tab>. It moves you on to the
next valid entry field.
<Ctrl>O inserts one space, at the current cursor position. The
cursor does not move, however all text to the right of the cursor moves one
position to the right. This function only works in alphanumeric fields.
<Ctrl>R undeletes one character from the delete buffer, at the
current cursor position. The cursor does not move, however all text to the
right of the cursor moves one position to the right. This function only works
in alphanumeric fields. This function is useful if you have deleted characters
from one place and wish to the insert them back into another place. The
programs will even allow you to delete and insert from different fields. Once
you accept a screen, the delete buffer is cleared and the function does not
work.
<Ctrl>X clears the whole line.
<Ctrl>Z clears the line to the right of the cursor and the
character the cursor is currently on.
<Ins> toggles the screen between Insert and Over-type
mode. In Insert mode, any character
you type will insert itself at the current
cursor position, moving the other characters one position to the right to make
room. Pressing the <Rubout> key will delete one
character to the left of the cursor, moving the cursor itself one character to
the left, dragging all characters to the right of the cursor with it. Over-type mode, any character you type
will replace the character at the
current position. Pressing the <Rubout> key (not <CsrRight>) will move the cursor to
the right without deleting any characters.
<Del> Deletes the character at the current cursor position
and moves all characters to the right of the cursor one position to the left.
<End> positions the cursor at the end of the current field.
Pressing <End> a second time moves the
cursor to the end of last valid field.
<Home> positions the cursor at the beginning of the first valid
field.
MODIFYING
HIFINANCE’S ENTRY POINT
HiFinance starts with a batch file called GO.BAT. If this is modified or by-passed, the package may
not function correctly at certain times. Normally, a menu system is also
supplied with HiFinance. This is the one described at the beginning of this
section as the OPTIONS MENU. The OPTIONS MENU is initialised with the
instruction HIFMENU followed by <Return>. If you intend to implement a different menu system,
be sure to initialise HiFinance through GO.BAT.
Several icons are also supplied with HiFinance in
the HF5PROG directory. These all end in
.ico and can be used to link the Windows desktop to either the menu
programs or GO.BAT.
GENERAL POINTS
ON PRINTING
All reports in HiFinance generate to a disk file
first. Some reports eg cheques, then print straight
away. Usually though, HiFinance will offer you the choice of displaying,
printing or saving the report. These functions are programmed into <F1>, <F3> and <F4>, respectively.
Displaying to the screen is often the preferred
method of viewing a report. There is no waste of paper and it is fast. The only
limitation is the maximum number of characters that can be displayed on a
screen. HiFinance displays the first 78 characters of each line and as many
lines as will fit after displaying the heading lines. To
display the rest of the line, press <CsrRight>
and <CsrLeft> to go back. To move
through the lines of a report, press <CsrDn>
or <PageDn> and <CsrUp>
or <PageUp> to return. The page numbers displayed
are the screen page numbers and do not correspond to those that would be
printed if the report were to be sent to a printer. To exit this function,
press <ESC>. It is possible to
direct the display to a HTML viewer such as Internet Explorer. To do this,
follow the instructions in Section 7.1.3.4.
Printing is the favoured method for long reports
that have to be studied, stored or analysed. The actual printer used to print
the report depends on the way you have setup the pointers in the ASSIGN LOCAL PRINTERS function (see Section 7.1.3.1).
When you press <F4>, the report prints immediately.
It is important, therefore to make sure that your printer is switched on and is
“on-line”. If not, HiFinance will display the message:
Printer
not available - Cancel, Retry or Ignore ?
If you get such a message, correct the fault on the
printer and press R. Printing should then start
and the message will usually be cleared from the screen. If you press I the program will continue, ignoring the fact that the printer is not
attached. In this case, no report will be printed but the program will function
correctly in all other ways. Unless absolutely necessary, do not press C as this will cancel the program and drop you back to DOS after printing an error message to
the screen.
In a LAN
environment printing can be direct, if each terminal station has a local
printer, but is normally spooled to a common printer. This means that no
printing will occur until the report is complete and then only if another
operator is not using the printer. This should be set-up and explained by your
dealer.
In Windows 95 or above, printing across the network
is achieved by directing the print to the spool file of the computer actually
attached to the printer, eg \\mary\epson. This method
avoids the long delay MS-Windows imposes while waiting for time-out. The only
disadvantage of this method is that HiFinance cannot control the “printer not
available” messages. If the printer is not available because you have either
miss-entered the path or the target computer is not on, HiFinance will simply
close down and return you to the Desk Top. Because printing is not a critical
function, you will simply have to restart HiFinance, correct the fault and
reprint. For Windows version 2000 and above, the direct method is not
available. You must use the NET USE command. For details refer
to your dealer. Also, with this method, you should set the LPTTIMEOUT parameter to stop the long delays.
In a UNIX
environment printing is always spooled to hard-disk before being printed. If
your printer is not ready, UNIX will
wait and print later. If you press <ESC> when a report has started,
it will still be printed up to the point where it was aborted. If you wish to
stop a large report from printing after it has been sent to the spooler, you
will need to use the cancel command from root, scosh, sysadmsh or scoadmin. Using cancel is only recommended for the experienced UNIX user. Do not try to cancel the
report by turning the printer on and off repeatedly. With parallel printers
this may result in UNIX detecting an
error and internally disabling the printer port from all further spooling. It
is then necessary to use the enable function. Again this
requires an experienced UNIX user.
Saving a report to a file is sometimes used when you
wish to bank-up a series of long reports at EOM, etc. You must choose a unique
name to save the report under. You can then later retrieve the file and print
it using the PRINT MANAGER function.
(See Section 7.1.8.)
The print functions discussed above can be mixed and
matched. You can display a report to the screen (to check that it is what you
want) and then print it, etc.
Since April 2013, HiFinance has changed the method
of entering and displaying dates. Because of the year2000 bug, it was necessary
to enter dates with the full 4-digit year. A decade later, this is not
required. So, the date entry routines have been changed to allow for faster
date entries. Dates are always entered in a 10 character wide field. This
allowed for entry of dates in the format of DD/MM/CCYY. Where DD represents the day; MM represents the month; CC represents the century and YY represents the year. In
this format the 30th of June 2013 would be entered as 30/07/2013, although the slashes were displayed but not
entered. The change now allows you to put virtually any sensible date format
into the 10 character field and HiFinance will interpret it as a date.
Although, by default, the date is displayed and printed in the standard DD/MM/CCYY format, it can be displayed in one of various
formats. These can be chosen in SYSTEM DEFAULTS, see SECTION
7.2.1.
HiFinance will attempt to recognise a date. If you
enter something not recognised, an error will be displayed. The date is
interpreted in the following way:
a)
The field is case insensitive, so it will accept upper or lower case
letters, or a mixture. Virtually any character that is not a letter or a number
can be used as a separator. Some formats do not need separators. Leading spaces
are ignored. Today’s date is the date, as displayed at the top-right-hand
corner of the screen.
b)
If the field is left entirely blank or contains the character 0 only, it is recognised as a date of zero. Depending on your choice of
display format, it might be displayed as 00/00/0000 or just a blank. This is
necessary for reports that require the date range to include a null date.
c)
If the field solely contains the word TODAY, YESTERDAY or TOMORROW, HiFinance will interpret
that as today’s date, one day before or one day after, respectively.
d)
If the field contains the word NEXTWEEK, HiFinance will add seven
days to today’s date. Also, putting in an arbitrary number of spaces will work
the same way, eg NEXT
WEEK, but not NEXT-WEEK, NE XTWEEK or NWEEK, etc. Similarly, NEXTMONTH,
NEXTYEAR, LASTWEEK, LASTMONTH and LASTYEAR, will translate to their respective dates.
e)
If the field contains the first 3 letters of a day (eg
MON or SUNDAY, etc)
by itself, or preceded by, a +, HiFinance will find the next occurrence of that day, not including
today. A day preceded by by
a – will look backwards to find the previous day. This
function is useful for forward dating deliveries, etc. For instance, you might
wish to invoice for next Wednesday. In this case, enter WED or +WED or WEDNESDAY. Note that this option must start from the first
character in the date field and must not contain imbedded spaces. Eg. + MON will not work. Note also
that + MO will be interpreted and +MONTH.
f)
If the field contains < as the first character (and
nothing else) HiFinance will return the date 01/01/0001.
Similarly, for >, HiFinance will return 31/12/9999. These dates are usually the default responses for
upper and lower date limits in reports. Thus, this is a quick way of restoring
the limit, if you have accidentally overwritten the entry field.
g)
If the field contains a + or – as the first character, or +D or –D as the first 2 characters, the subsequent portion of the field will be
interpreted as a number. HiFinance will then take today’s date and either add or subtract that number of days and return the date to
you. The number may be up to 99999, but very large numbers can
give un-expected results. If you start the date field with a + or -, HiFinance will attempt to
interpret the rest of the field as a number. If it cannot work it out, it will
be interpreted as zero and TODAY will be returned.
h)
If the field contains +W or –W as the first 2 characters, the subsequent portion of the field will be
interpreted as a number. HiFinance will then take today’s date and either add or subtract that number of weeks and return the date to
you. The number may be up to 99999, but very large numbers can
give un-expected results.
i)
If the field contains +M or –M as the first 2 characters, the subsequent portion of the field will be
interpreted as a number. HiFinance will then take today’s date and either add or subtract that number of months and return the date to
you. The number may be up to 99999, but very large numbers can
give un-expected results.
j)
If the field contains +Y or –Y as the first 2 characters, the subsequent portion of the field will be
interpreted as a number. HiFinance will then take today’s date and either add or subtract that number of years and return the date to
you. The number may be up to 99999, but very large numbers can
give un-expected results.
k)
If the field contains a one or two digit number, other than zero, and
nothing else, this will be interpreted as a day number. HiFinance will return
today’s month and year, with that day number. Eg if
today’s date is 10/12/2013 and you enter 4, HiFinance will return 4/12/2013. Obviously, the number must
be a valid day for the month.
l)
If the field contains exactly 4 consecutive digits, and nothing else
but spaces, this will be interpret that as the day and month. The year will be
taken from today’s date. The month should be between 1 and 12 and the day
should be a valid day for that month. An invalid month will be returned as XXX.
m)
If the field contains exactly 6 or 8 characters, it will be interpreted
as DDMMYY or DDMMCCYY, respectively. It should be
a valid date combination, or the date will be rejected.
n)
If the field contains 3 sets of numbers, separated by separator (see
above), it will be interpreted as DD
MM YY or DD MM YYYY. It is thus important to enter either
1, 2 or 4 digits for the year. Eg. 10-10-10 will be interpreted as the 10th of November 2010.
So will 10 10 10; 10/10/10; 10/10 2010. 10?10?10 and 10/10/2010. Do not attempt to enter letters when using this
option as they will be interpreted as a month and will return un-expected
results or an error.
o)
If the field is in the format of a day number month name and,
optionally, a year, this will be interpreted, as above. In this case,
separators are optional. Thus, 1Jan10 will be interpreted as the 1st
of January 2010, so will 1JA10 and 01 ja
10. HiFinance will accept any string of letters that start with the first few
characters:
JA for January
FE for February
MAR for March
AP for April
MAY for May
JUN for June
JUL for July
AU for August
SE for September
OC for October
NO for November
DE for December
Note that none
of the abbreviations may be less than 2 characters and, in some cases, 3
characters must be entered to avoid ambiguity. If you enter more than the
minimum abbreviation, as defined above, it must be a subset of the month’s
name. Eg you may enter SE or SEPT or SEPTEMBER for September, although the
last one is so long that you will be unable to enter a year.
