HiFinance
5
SECTION
1.3.9I.3.1 – NEW SHIPMENT
USAGE: To add a new Shipment to the system. This is
basically a Daysheet for the Truck pickup and delivery. You can enter all the
pickup details including multiple pickup points, components for blended fuels
and prices, which are normally preloaded into the system, but can be
over-written here. (See SECTION 3.5.6I for further details.) You can then enter
all the delivery points including actual sales. HiFinance automatically
converts components to blended fuels. Deliveries to clients can be linked to SALES ORDERS previously entered. (See SECTION 1.3.7.)
If you do this, the order will be deemed complete. Once these two items are
entered, the balancing information can be entered. This can include pickup from
storage and delivery to storage. Eg you can purchase fuel and deliver to
partially or completely to your storage facilities. Finally, Truck details are
entered. HiFinance will apply freight charges, as per the freight tables. (See SECTION 3.5.6I.3).
When this is complete, HiFinance will display a summary of the deliveries. The
nominal profit margin is computed and if you are finished, all files will be
updated.
DISCUSSION: When you start the NEW SHIPMENT program,
the computer will initially ask for a date. Insert the date and press <Enter>. The data is the date of pickup (and delivery). If
you pickup on one day and deliver on a subsequent day, you should enter this as
two Shipments.
The screen will appear as follows:
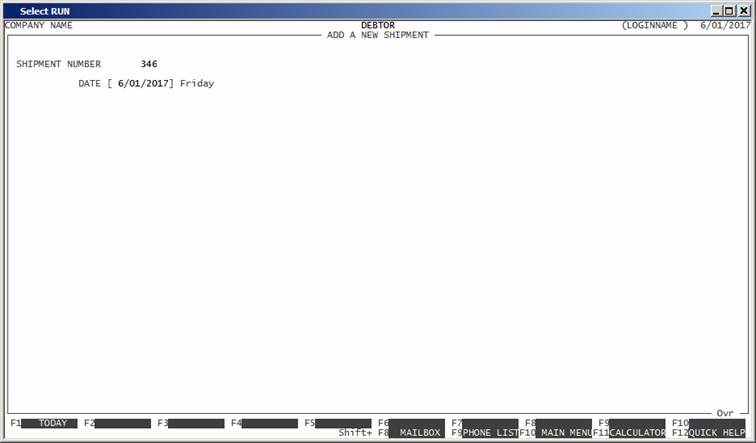
The screen displays the SHIPMENT NUMBER. This is generated by HiFinance and is the next
number after the last Shipment created. You cannot change this number. It
defines the Shipment from now on.
The DATE you enter is the date of
the Shipment. If you have split the shipment over several days, it is sometimes
best to enter two separate Shipments. This is especially true when leaving the
fuel on the Truck overnight and using a different prime-mover to complete the
delivery on a subsequent day. The different prime-movers may have different
freight rates, etc and there is only provision to enter one Truck per Shipment.
The date entered will be the date of all updates, ie
Purchase, Invoices, Fuel transfers will all carry this transaction date.
If you press <ESC> here, the Shipment will not
be created and the number can be reused. If you enter a date and press <Enter>, a blank Shipment will be created. The only way
forward from there is to enter the details or Cancel the Shipment. (See SECTION 1.3.9I.3.3).
Before creating the blank Shipment, HiFinance will ask you to confirm.
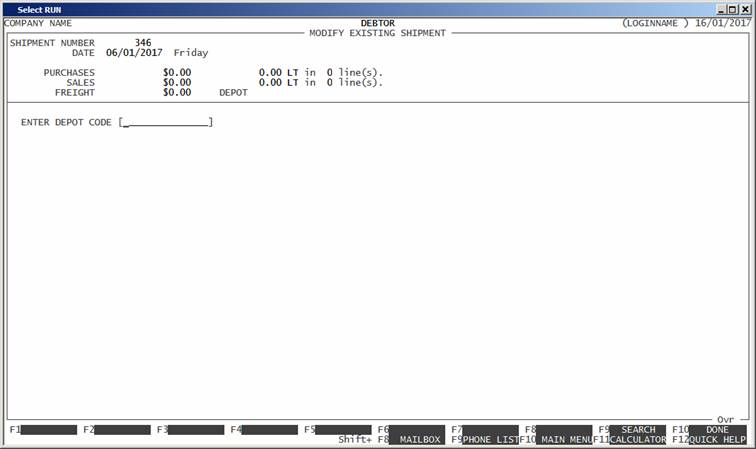
The screen now appears as follows:
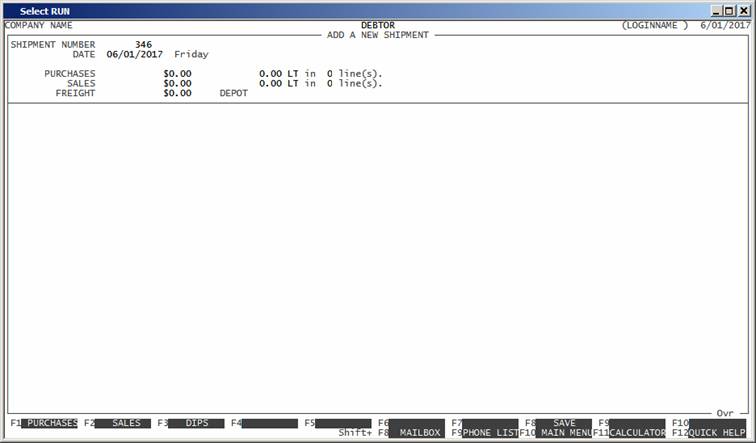
The top of the screen always shows the Shipment
number, the date and day of the shipment, the total Purchases in Dollars and
Litres, the total Sales in Dollars and Litres, and the Freight value. This
heading is updated and carried through to every page except the summary page,
where the information is displayed differently.
So far, this is an empty shipment, containing no
information. If you <ESC> here, the number will be
reserved but there will be no data.
At this point your choices depend on what you need
to enter. The following functions will appear:
<F1> This option will always appear. It allows you to
branch to the PURCHASES function. Here you have the
ability to enter up to 20 purchase lines. It is not compulsory to enter any
Purchases. The fuel may not have been sourced from a supplier. It may have
already been on the Truck and/or it may have come from storage.
<F2> This option will always appear. It allows you to
branch to the SALES function. Here you have the
ability to enter up to 20 sales lines. It is not compulsory to enter any Sales.
The fuel may not have been delivered to Customers. It may be left on the Truck
and/or it may have been delivered to storage.
<F3> This option will always appear. It allows you to
branch to the DIPS function. This allows you
to enter balancing information. Here you enter any fuel that you may have been
picked up and/or delivered to storage. If fuel is left on the truck, you have
the option to enter Dip information. Also, this function checks that the fuel
adds up (in litres). Certain tolerance is allowed for, but after that, SUPERVISOR override is required.
<F4> This option is only available after you have
entered DIPS. Here you can enter all the
Freight information. If you go back and change Purchases or Sales, you will
need to go through the DIP screen again before the FREIGHT screen will be available.
<F8> Al any point, you can save the Shipment in its
partial form. Normally this happens when you find that you have partial
information and need to come back to this Shipment later. Remember that you
should not update Shipments (for the same Truck) out of order.
<F10> When everything has been entered, you have the option
to UPDATE. A summary page is displayed and you are
required to confirm the update.
<ESC> At all times, you have the option to <ESC>. This will forget the last changes you made. Eg if
you are in the Dips function, <ESC> will revert to the previous
values, which might be blank if you are entering a new Shipment.
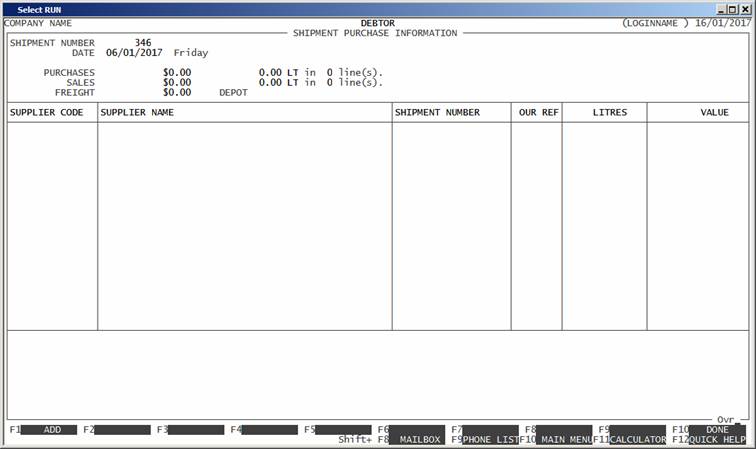
PURCHASES
Pressing <F1> will display as follow:
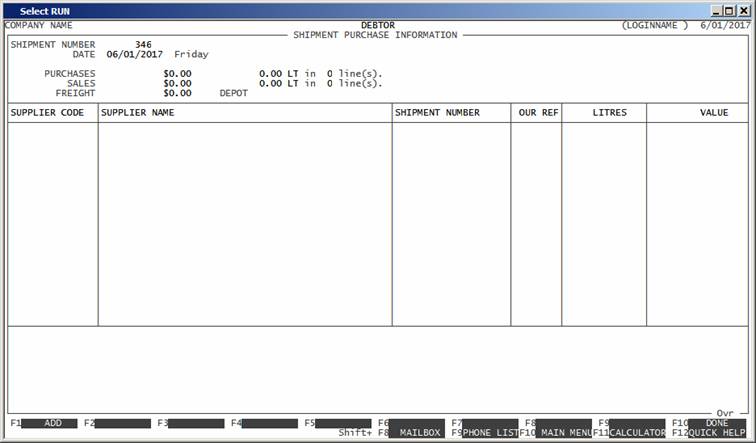
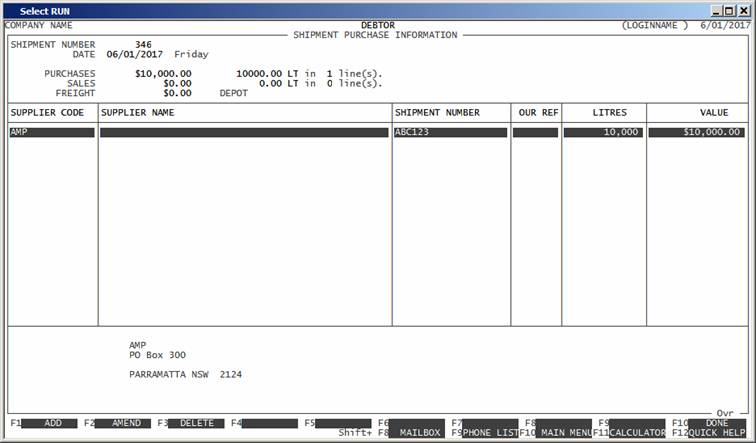
If there are no Purchase lines entered, you will
only have the option to <ADD> or <ESC>. Once there is at least one line entered, you will
have the option to <MODIFY> and <DELETE>. These allow you to change the purchase quantities
and prices, or delete the line, respectively. You cannot change a Creditor. If
you have entered a wrong line (ie Creditor) you will need to delete the line
and re-enter it.
When you press <F1>, you will be required to enter
a Creditor code. (You can search for a Creditor by pressing <F9>.) Choose a Creditor and confirm. The screen will
appear as follows:
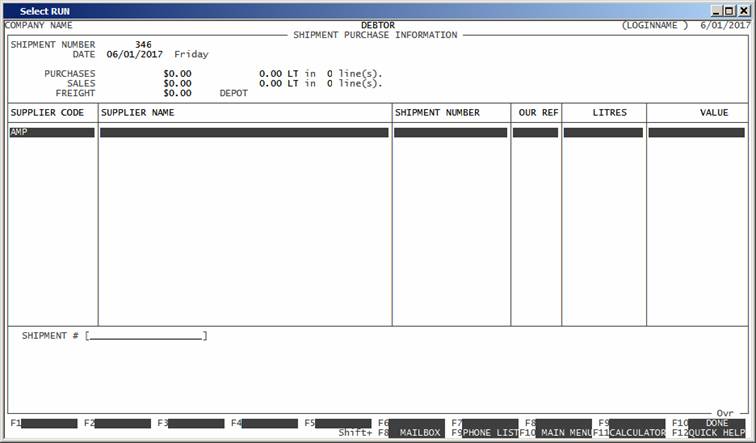
The following fields will be requested:
SHIPMENT # This is the Supplier’s reference number. It is a compulsory field.
OUR ORDER # This is where you can enter your Purchase Order number. This field
is not compulsory, but it is good practice to enter it, if there was one. This
way, HiFinance will contain all the documentation and you will not need to
resort to the source document if there is an issue.
The screen now looks as follows:
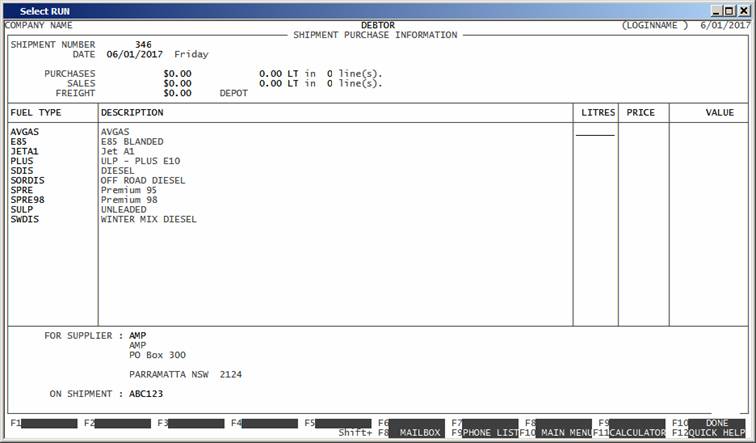
There are always up to 20 fuels displayed. Certain
of these fuels will components of other fuels. This depends on how you have
setup the fuel tables and components.
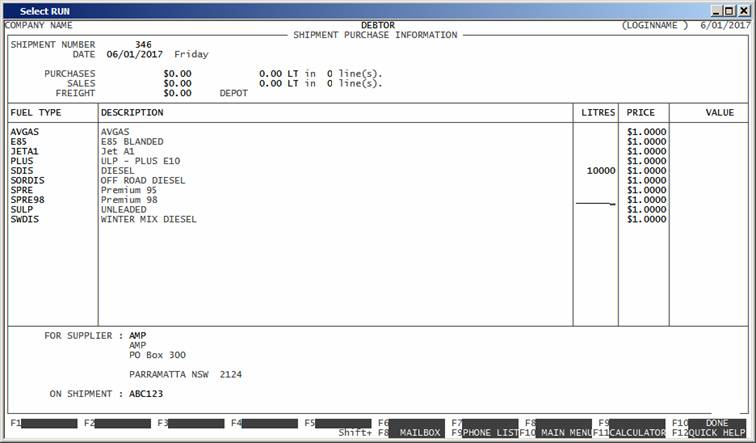
Here you enter a entry, for litres, for each fuel
picked up from this Creditor. The price should be picked up automatically from
the purchase prices entered for this Creditor for this day. (See SECTION 3.5.6I.1
for details.) Normally, this is entered the day before.
You can overwrite the prices, if necessary. You must
enter a quantity on at least one line.
A typical entry would be as follows:
To complete your entry, either press <Enter> past the last fuel line, or press <F10>.
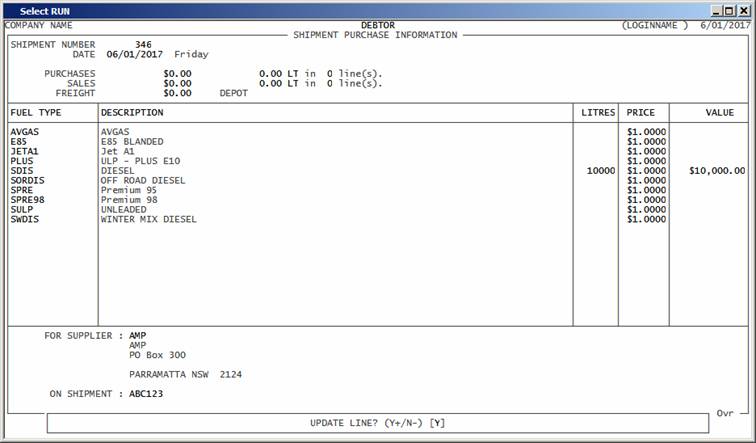
Confirm your entry.
You will notice that the total Purchase (at the top
of the screen) has been updated. Also, because there is already one line
entered, <F2> and <F3> are live.
You can now enter another line or press <F10> to update this portion of the Shipment.
SALES
Pressing <F2> will display the following:
The first thing you need to tell HiFinance is the
Depot from which the fuel is being picked sold. This defines the pricing. Enter
the Depot Code or press <F9> to open a search.
If there are no Sales lines entered, you will only
have the option to <ADD> or <ESC>. Once there is at least on line entered, you will
have the option to <MODIFIY> and <DELETE>. These allow you to change sales quantities and
prices, or delete the line, respectively. You cannot change a Debtor. If you
have entered a wrong line (ie Debtor) you will need to delete the line and
re-enter it.
When you press <F1>, you will be required to
enter a Debtor code. (You can search for a Debtor by pressing <F9>.) Choose a Debtor and confirm. The screen will
appear as follows:
If there are any un-filled Sales-Orders for this
Debtor, you will be asked if you wish to process any of these. If so, a screen
will open allowing you to choose which one. If you choose an order, HiFinance
will preload the screen with the order, filling in the stock, quantities and
prices. You can still override this information if, for instance, 16,000lt was ordered and only 15,995lt
was delivered. If the shipment was originally ordered via the Sales Orders, you
should use this function to load the screen. If you do not, the order will
remain on file as an un-filled order and will continue to come up on reports.
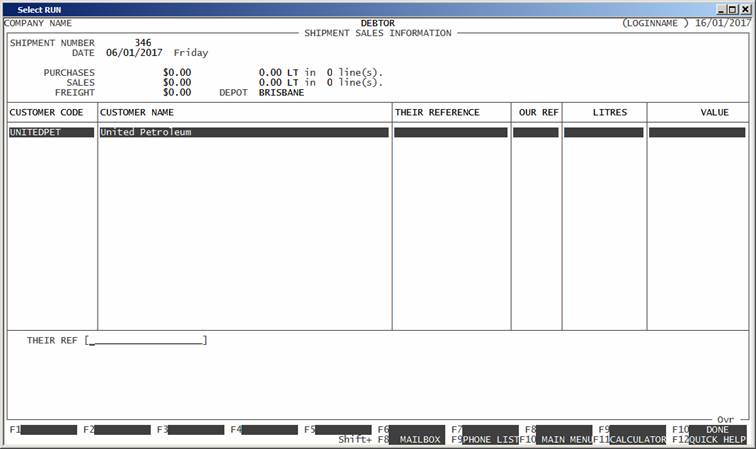
The following fields will be requested:
THEIR REF This is the Customers reference number. It must not be blank.
If you are entering from a Sales Order, the field will be picked up from the
order. This field will be printed on the Invoice.
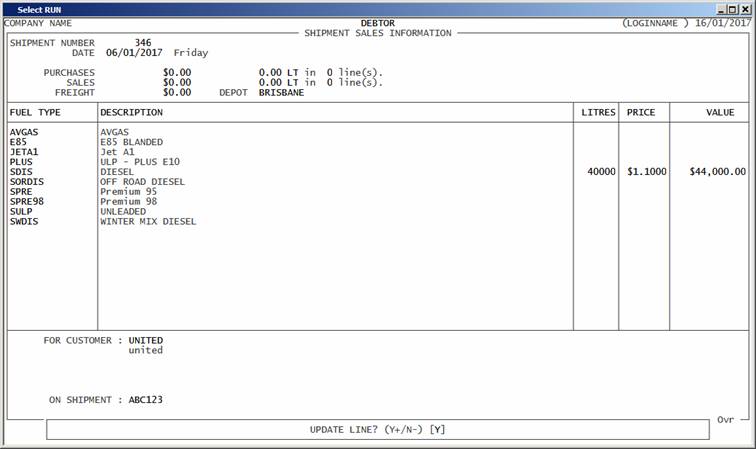
The Screen now looks as follows:
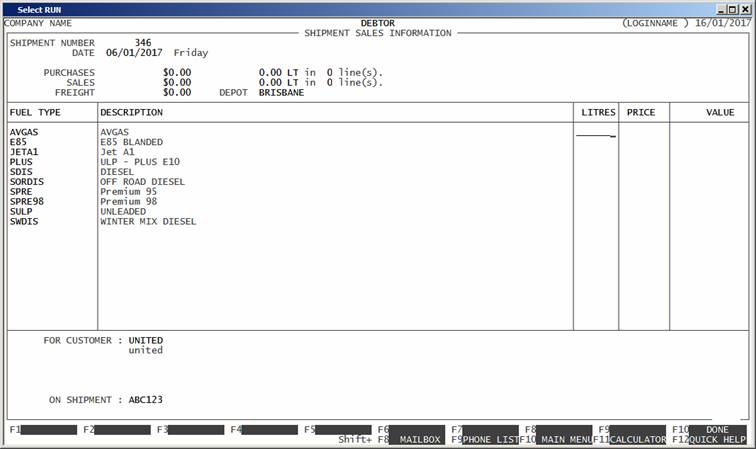
There are always up to 20 fuels displayed. You can
sell composite fuels and/or components. Eg You can sell E85 and/or Ethanol.
Here you enter an entry for litres sold to the
Debtor. The prices should be picked up automatically (if there is a price
record for this Debtor for the Shipment date).
You can overwrite the prices, if necessary. You must
enter a quantity on at least one line. Prices include GST.
A typical entry would be as follow:

To complete your entry, either press <Enter> past the last fuel line, or press <F10>.
Confirm you entry.
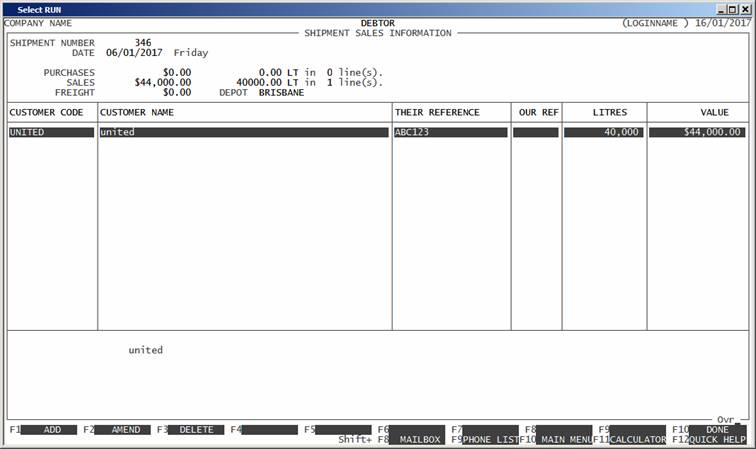
You will notice the total Sale (at the top of the
screen) has been updated. Also, because there is already one line entered, <F2> and <F3> are live.
You can now enter another line or press <F10> to update this portion of the Shipment.
DIPS
Pressing <F3> will display the following:
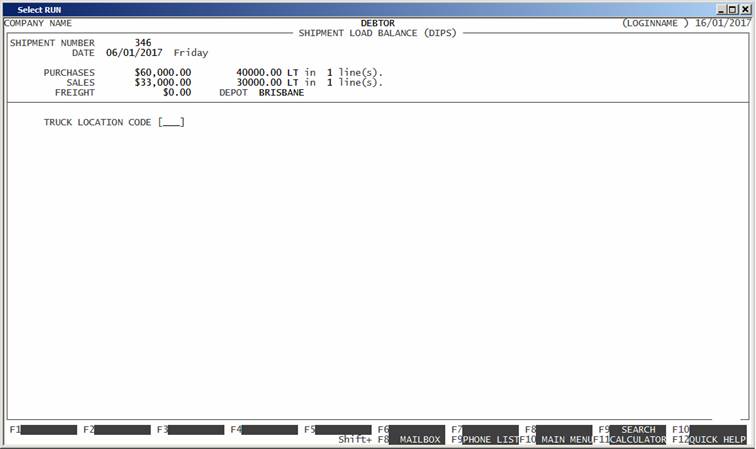
The first field you need to enter is the Truck. This
is the location code of the Truck that was used to transport the fuel. It must
be a number in the range X11 to X99 or X00 (where X represents a number from 2 to 7 corresponding to the State).
Codes that end in 00 are considered external
Trucks and are treated as such. Codes that end in 11 to 99 are your Trucks and will
not create a Purchase Order, but will update the General Ledger with freight as
an expense.
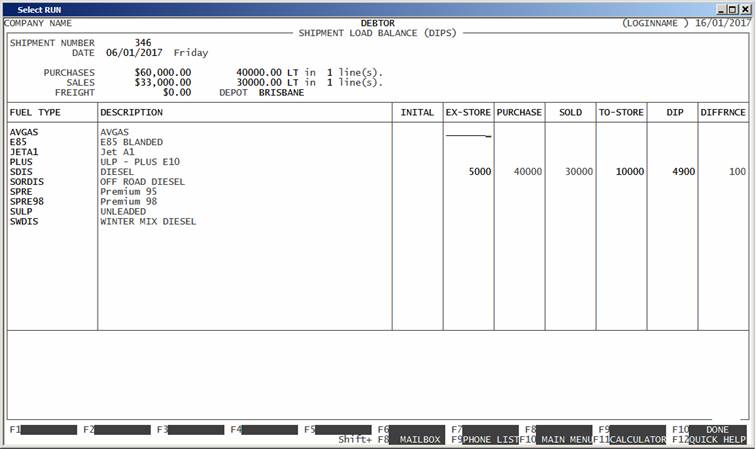
The screen now appears as follows:
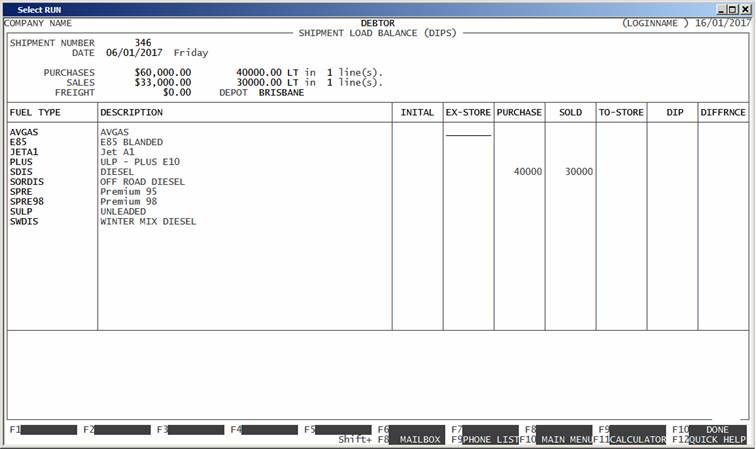
As in the other screens, there is a line for each
Fuel. Note the columns. They are as follows:
FUEL TYPE This is the Inventory code of the fuel as it appears on the Inventory
master-file.
DESCRIPTION This is the Inventory description, as it appears on the Inventory
master-file.
INITIAL This shows the units on hand, for the fuel, as it appears
in the Inventory master-file, for this location. This is basically an opening
stock figure. It should be the units of fuel the Truck had at the start of the
run. Often it is zero. It should be zero for external Trucks (except in
Queensland). Note that, if you enter Shipments out of order, the opening stock
might be wrong. If this figure is incorrect (eg due to a faulty dip) you must
correct it using STOCKTAKE ENTRY
(see SECTION 3.3.2).
You cannot modify this value from the Shipments program.
EX-STORE This represents any fuel that you loaded from your own storage.
HiFinance will ask you later which storage location it was.
PURCHASE This displays the total litres of fuel purchased. You cannot
modify this value here. If it is wrong, it means that you have entered an
incorrect purchase. In this case, you should <ESC> and return to
PURCHASES.
SOLD This displays the total litres of fuel sold. You
cannot modify this value here. If it is wrong, it means that you have entered
an incorrect sale. In this case, you should <ESC> and return to SALES.
TO-STORE This represents
any fuel that you unloaded to your own storage. HiFinance will ask you later
which storage location it was.
DIP This is the physical dip litres to be left on
the Truck. This will be zero unless you are storing fuel on the Truck. When you
update the Shipment, this will be the INITIAL value on the next Shipment.
DIFFRNCE This shows the difference in the Dip. It is computed as INITIAL + EX-STORE + PURCHASE - SOLD - TO-STORE. Currently, if the
difference is more than 400 litres under or greater than 1000 litres over, the
update will not be accepted without SUPERVISOR
override.
Typically,
the screen will look, as follows:
If you have entered any values into the EX-STORE column, HiFinance will request a Location. This is the
location of the storage and must be a number ending in 01 to 10, eg 401. Similarly, if you have entered any values into the TO-STORE column, you will need to supply a location. Any
stock that is lifted from EX-STORE will have a value of the
average stock-on-hand at that location. Any stock that is delivered to a TO-STORE location will be costed at the average buy price
plus any value of freight. The locations can be the same, but this only makes
sense if they are for different fuels. Eg Pickup ULP at
one depot and dump some DIS at the same location. You
can only enter one EX-STORE and one TO-STORE. In the unlikely event that the Truck is delivering
to two storage areas, you will need to enter this as two separate Shipments.
However, there is no reason that you cannot pickup some fuel from storage and
some more from a supplier and even some from yesterday’s dip, all on the same
shipment.
Typically, the screen will look, as follows:
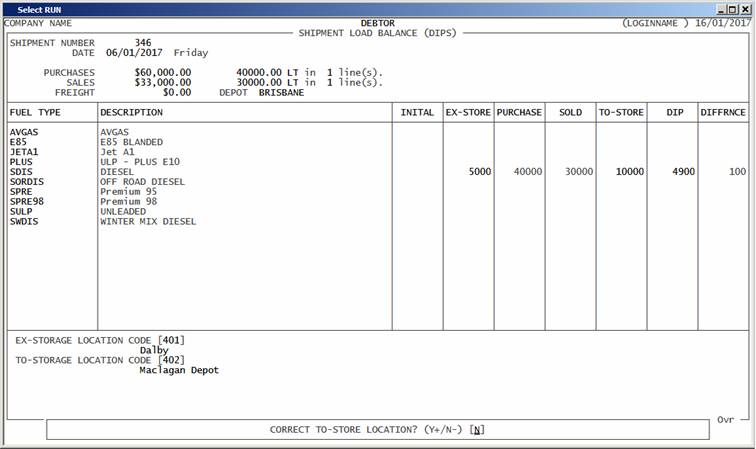
If you have entered all the information, and it
balances, HiFinance will ask for confirmation and the will save the record.
FREIGHT
This option will only be live if you have entered
the DIPS screen. Pressing <F4> will display the following:
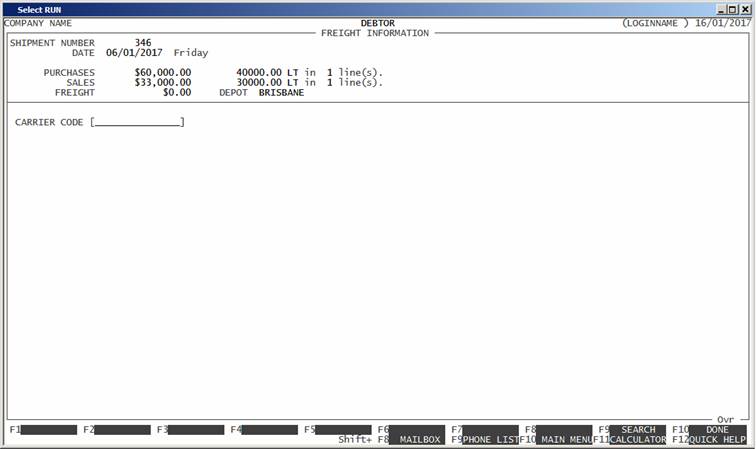
This is where you enter any Freight charges. You
will be asked the following questions:
CARRIER CODE Here you enter the code of the Carrier. Either enter the
Creditor code or press <F9> to open a search screen.
TRUCK TYPE Here you enter the code of the Truck type. This must be a type
that the Carrier uses. Either enter the Truck code or press <F9> to open a search screen.
TRUCK REGO This is an optional field where you can enter the registration
number of the Truck. If the registration number is part of the Truck
description, this field is redundant.
ODO START Some sites wish to enter the odometer readings for insurance
and maintenance purposes. Here you enter the starting odometer reading.
ODO END Some sites wish to enter the odometer readings for
insurance and maintenance purposes. Here you enter the ending odometer reading.
DRIVER ID This is an optional field. Here you enter the name of the
Driver.
The screen will repaint and display the following:
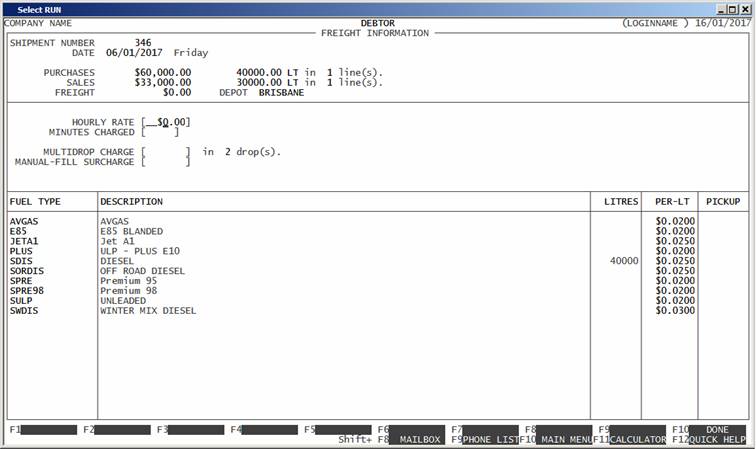
The current freight information will be displayed on
the screen. This may need to be over-ridden for some reason, but this should be
rare. Press <Enter> past any fields you do not
wish to change. The litre value is as per your Deliveries and cannot be changed
in this screen. If all is OK, press <F10> to go to the end of the screen. If you have entered
a charge for MULTIDROP, you may have
to enter more information, ie number of drops, so that HiFinance can compute
the complete freight cost and any on-charges to the customer. The information
asked for is slightly different for various sites but the prompts should be
self-explanatory. Before updating the freight screen, HiFinance will display a
summary page and allow you to accept of reject your entry.
HiFinance will ask you to confirm the screen and
then will return you to the base screen.
UPDATE
This function will only appear if you have completed
the Freight screen.
Having completed all the information on this
Shipment, you can now press <F10> to initiate the final phase
of the Shipment. The screen will typically appear as follows:
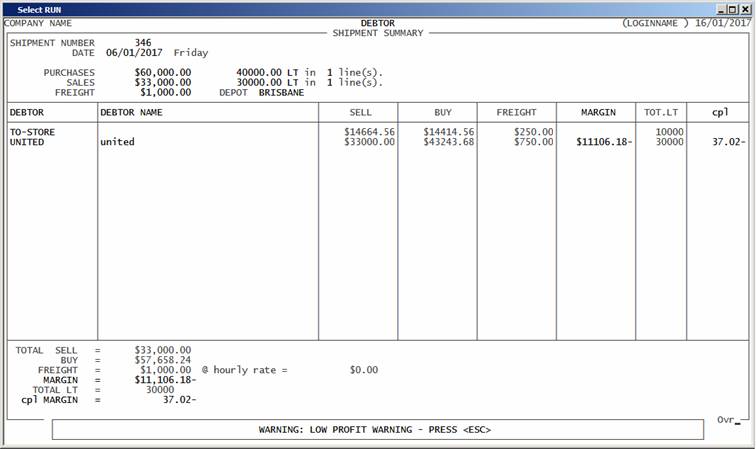
Consider the above screen. This is a summary of the
whole shipment. The purpose of this screen is to give you a final look at the
entry before finally committing it. For each Sale line (Debtor or TO-STORE)
there is an entry detailing the value of the sale, the cost price, fright,
margin, total litres and the margin in cents per litre (cpl). If any of the
lines shows as less that 1 cpl, there will be a warning generated. You can
still update the Shipment (as there may be a reason for the low profit) but it
is usually due to an incorrect entry, so you should not update but instead go
back and check each part of the entry.
If you have checked the information, you can now
update the Shipment.
When you update, HiFinance will create an Invoice
for each Sale line; a Purchase for Purchase line; update any stock involved,
including moving fuel from and to storage. If the Carrier was not one of yours,
HiFinance will create a Purchase Order for the Freight. The reason for this is
that the Freight is not payable until you receive an Invoice from the freight
company. Also, you will need to reconcile the freight. When you do, the
Purchase Order will be cleared and a Purchase will be created. If the freight
company is you, no Purchase Order will be created. Instead, HiFinance will just
create an entry in the General Ledger recovered costs account. When the update
is finished, HiFinance will ask if you wish to print invoices. If you choose to
print invoices, the normal process will occur, ie invoices can be emailed,
faxed, or printed, as defined in the Debtor’s master-file record. No Purchase
Orders will be printed.
When all the updating and printing is complete,
HiFinance will return you to the Date screen where you can either enter a new
Shipment or <ESC> to the MAIN MENU.