HiFinance
5
SECTION 7.2.8H - LINK DATA
PATHS
USAGE: To setup link information
for special Creditor to Debtor Link programs. This open will only appear, for
sites that use the option. This link programs are designed to send Creditor
Purchase information out to a link file that can then be read into another set
of data, as a Purchase Order. The programs assume that both data sets are on
the same physical machine. The function is designed to make it easy for a subsidiary
company to purchase from head-office without having to re-enter the data.
DISCUSSION: When you start the program,
the screen appears as follows:
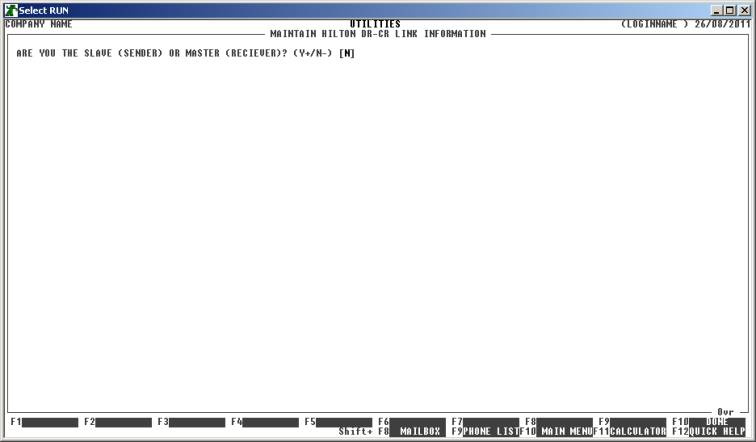
Here you must enter a Y or N. If you are on the data set
that pertains to the subsidiary company, ie the one that will be making
Purchase Orders, enter Y. For the head office company, enter N.
If you have entered Y, the screen will look as
follows:
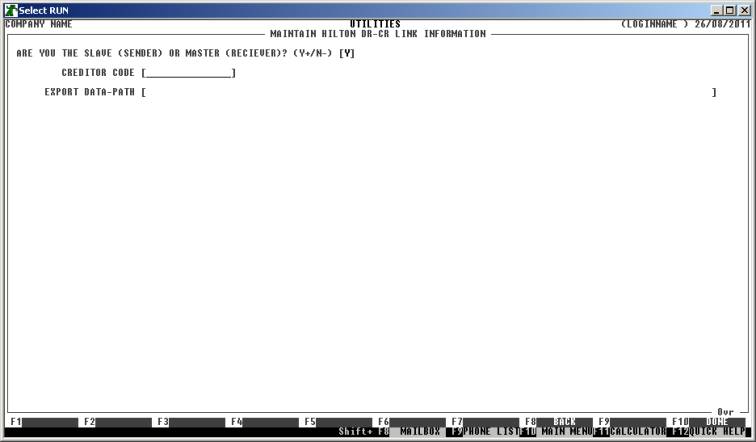
Here you enter the Creditor code of the Head office
account. Each time a new Purchase Order is entered on this Creditor, the export
file will be created or appended to. No other Creditor will be affected. You
must also enter the full path name you intend to use as the link directory for
this process. You should enter the path name, including all \’s, eg h:\hf5data\transfer\
. The directory you choose must exist. HiFinance will not create it.
If you enter N to the original question,
the screen will display as follows:
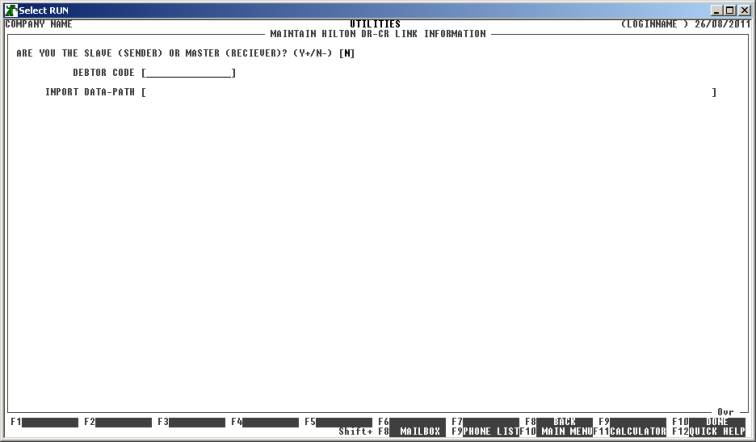
In a similar fashion, as described above, you now
have to enter the Debtor code of the Debtor that will represent the subsidiary company.
This is the Debtor that will be used for creating Sales orders. You also need
to enter the data-path. The rules for this are the same as above.
When the export runs, it will create a file called transfer.22o, in the directory you have
chosen. When the import program runs, it will rename this file to transfer.yyyymmddhhmmssff, where the suffix is now
the full date and time the program was run. HiFinance will not delete any file.
This allows problem files to be modified and re-imported. Eventually, the
directory will be full of transfer files. It is the user’s responsibility to
cull the directory from time to time.
When you have finished, press <F10> to save the changes.
To return to the UTILITIES TABLES MENU, press <ESC>.