HiFinance
5
SECTION
5.3.2 - PRODUCTION SCHEDULES
USAGE: The Production Scheduling system is designed to
maintain a perpetual calendar of you production needs, and in conjunction with
the BOM records, allow you to plan your component requirements.
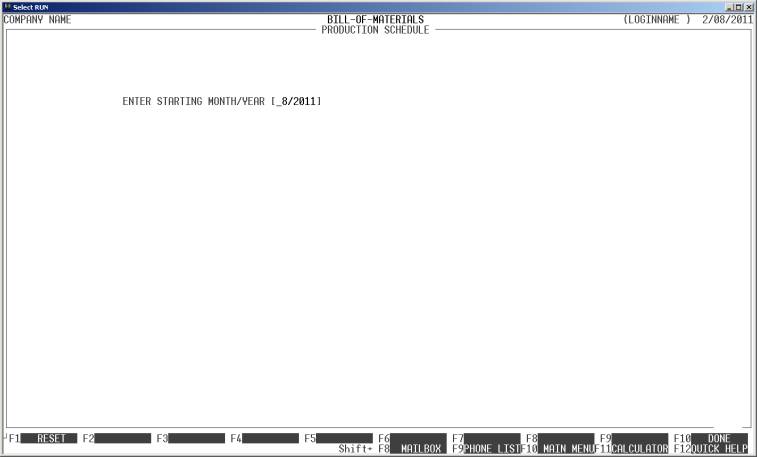
DISCUSSION: When you start the PRODUCTION SCHEDULE
program, the computer will initially ask for a starting month and year for the
calendar. By default, you will be placed into the current month and year,
however, you may wish to work in a different period. Enter the month and year
and press <Enter>. The screen looks as
follows:
and then changed to the following:
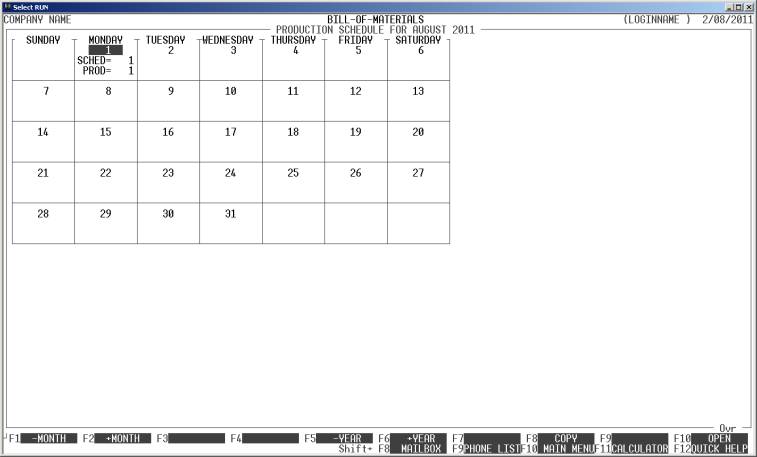
This screen displays the days of the month and will
display how many lines have been scheduled and how many lines of production
have been entered.
You have various options here:
Name Comments
Cursor keys By pressing the left and right cursor keys, you can
move to a different day. The cursor keys will not allow you to move outside of
the displayed month.
<F1> This will move the display back one month.
<F2> This will move the display forward one month.
<F5> This will move the display back one year.
<F6> This will copy the current day (Schedules only) to a
different date. This is used when you have a recurring schedule. Once you have setup
the first day, you can copy the layout to as many days as you wish.
<F8> This will copy any lines in the current day to
another day (Schedules only). This is used when you have not been able to
complete a schedule for one day and have to pass it over to another day.
Complete lines will not be moved.
<F9> This will move the display forward one year.
<ESC> To leave the program, press <ESC>.
<Enter> or
<F10> This will open the day and allow you to
modify its contents (see below).
CURRENT UNIT VALUE This value is displayed to show you the current value of the
Assembly.
When you open the contents of a day, the screen will
appear as follows:
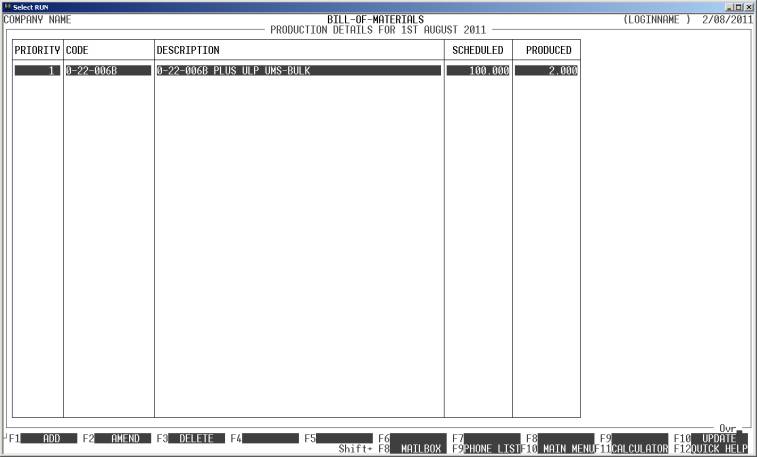
You can add any number of lines to this screen. You
have various options here:
Name Comments
Cursor keys By pressing the up and down cursor keys, you can
move to a different line.
<F1> Add a new line. An Inventory line can only appear
once per day.
<F2> This will allow you to change the information
pertaining to the line (see below).
<F3> This will delete the Inventory code from the current
day.
<F5> This allows you to mask the display to only show
specific items. These are currently defined as being the PREP, MIX
or OTHER Inventory Group. OTHER is anything other than PREP
or MIX. When you choose this option, only items in this Inventory Group
will be displayed. This can help when there are a great number of items and you
only wish to see a subset.
<F6> This option will only appear if you have chosen to
mask (see above). Pressing this option will cancel masking.
<F7> Each line has a priority, ie the priority of
production and the screen is displayed in priority order. To move a line to a
different priority, press <F6> and enter the line number
you wish it to move to.
<F8> This option allows you to move a line to a different
day. The day must be in the future and there must be no quantity produced.
<F10> This allows you to change the location (if you are
running multi-location stock) and then commits the changes you have made.
<ESC> To leave the screen without changing any lines, press
<ESC>.