HiFinance
5
SECTION
1.3.3 - DEBTOR ADJUSTMENTS
USAGE: To apply ad hoc debits and credits to Debtors.
This is useful for shifting balances between accounts, and for making entries that
do not affect the bank. This function is capable of shifting balances from
Debtor to Debtor, Debtor to Creditor and Debtor to General Ledger.
DISCUSSION: Debtor Adjustments or Journals are used in many
procedures or adjust or fix balances. There are several examples:
·
If
you wish to write off a Debtor’s balance you could enter a Debtor to General
Ledger adjustment where the General Ledger account is the Debtor Write-off
account.
·
Special
Charges such as interest can be applied via adjustments, as long as you do not
need to print an invoice.
·
If
you have invoiced the wrong Debtor, you should normally enter a Credit Note and
a new Invoice, but if the Invoice has already been paid, you can shift the
balance to the correct Customer by a Debtor to Debtor adjustment.
·
If
a Debtor that has been billed as a multiple of customers but now wishes a
consolidated bill, you can consolidate the balances via Debtor to Debtor
adjustments.
·
Similarly,
if a large customer pays multiple accounts via a single cheque, you can enter
the whole cheque into one account and then shift the remaining value to the
other account. (Adjustment can be allocated just like any other transaction.)
·
To
mimic reality, if you contra a bill, you can directly adjust a balance in
Debtor and Creditors in one go.
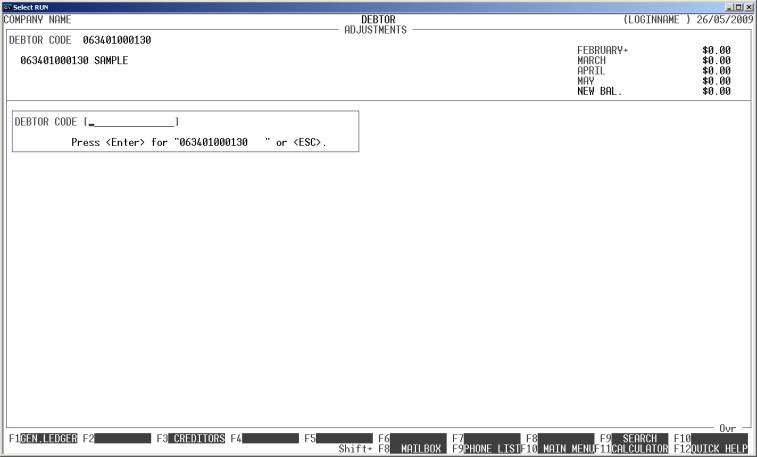
When you start the DEBTOR ADJUSTMENT
program, the computer will initially ask for a Debtor code. Insert the code and
press <Enter>.
To return to the DEBTOR DATA ENTRY MENU, press <ESC>.
To search for a Debtor, press <F9>. For further details on searches, see SECTION 1.2.
Having chosen a Debtor, the screen will display the
name and address and recent balances, in full at the top of the screen. The
screen will appear as follows:
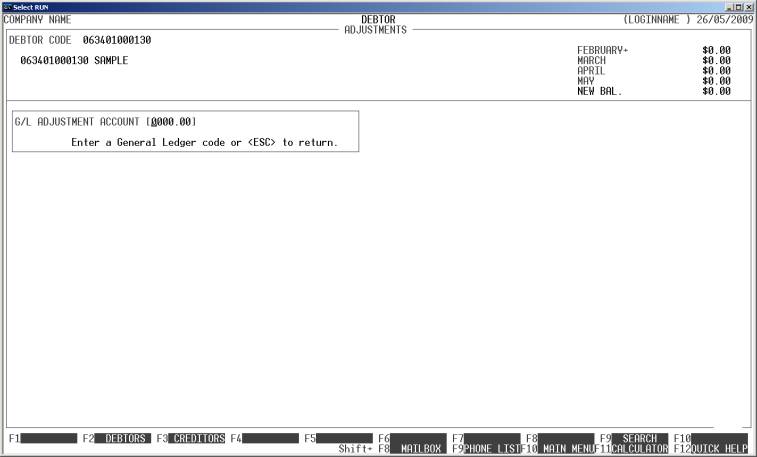
By default HiFinance will offer the Debtor to
General Ledger option. If you wish to continue, enter a General Ledger account
number (eg Debtor Write-off) and press <Enter>. You can also use <F9> to search for a General Ledger account.
There are certain accounts that HiFinance will stop
you from posting to, eg Bank, Trade Debtors. These are only posted to via other
programs, eg Invoicing.
If you wish to enter a
Debtor to Debtor adjustment, press <F2>. The screen will change to:
Here you can choose a second Debtor to post to. You
can use <F9> to search for a Debtor.
This must be a different Debtor account to the first one, and you cannot post
to Debtor sub-accounts (ie Debtors with a / in their code).
If you wish to enter a
Debtor to Creditor adjustment, press <F3>. The screen will change to:
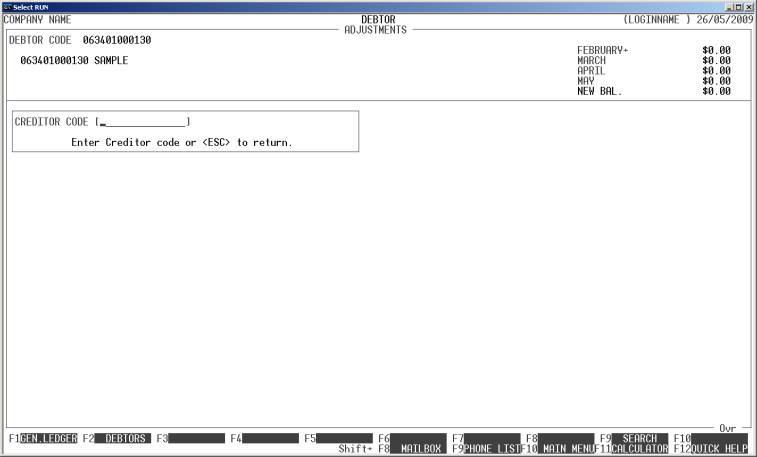
Here you can choose a Creditor to post to. You can
use <F9> to search for the Creditor.
Irrespective of whether you are posting to a General
Ledger account, another Debtor or a Creditor, when you choose the second
account, HiFinance will display the current balance of that account. The format
depends on what kind of account it is.
The screen will now split
into 3 parts. The top section is the Debtor details, the middle section shows
the second account’s details, and the bottom section allows you to enter the
details of the transaction.
An example is:

The fields available are:
DATE This is date you wish to make the transaction apply.
The date does not have to be in the current period, but if you backdate a
transaction, HiFinance will not let you choose a date in a closed period. To
close a period, use the CALENDAR
function. (See SECTION
7.1.6.)
COMMENTS Here you must enter the reason for the Adjustment.
VALUE This is the value of the transaction. By default,
this is a debit amount, ie it will increase the balance of the first Debtor. To
change it to a credit value, press - . When you leave this
field, HiFinance will update the NEW
BALANCE fields on both accounts (sections 1 and 2 of the screen) to show
you what the effect of you entry would be, but the balances will not actually
be changed until you choose to update.
<F8> If you wish to return to section 2 of the screen,
press <F8> or <CsrUp> at the date field. This may be more efficient than pressing
<ESC> and restarting the
transaction.
<F9> This will initiate HiFinance’s calculator. When you
press <ESC> from the calculator, the
result will be inserted into the value field.
<ESC> To abort the whole transaction, press <ESC>. You will then be returned to the Debtor code
entry routine.
To finally update your transaction, press <F10>. You might be asked if you wish to allocate the
transaction depending on the transaction type. If you choose Y, you will be transferred to the relevant allocation program and on
completion, you will be returned to the adjustment program.
Files updated by the Debtor Adjustment program:
Debtor
master-file: The first Debtor’s balance
will be increased by the value of the transaction. If you are entering a Debtor
to Debtor transaction, the second Debtor’s balance will be reduced.
Debtor
transaction-file: A transaction is
created to match each balance updated.
Creditor
master-file: If you are entering a Debtor
to Creditor transaction, the Creditor’s balance will be increased.
Creditor
transaction-file: A transaction is
created to match the balance updated.
General
Ledger master-file: If you are entering a
Debtor to General Ledger adjustment, the relevant General Ledger account will
be updated. If you are entering a Debtor to Debtor adjustment, no General
Ledger involvement is required. However, if you are entering a Debtor to Debtor
or Debtor to Creditor adjustment, the Trade Debtors and, where relevant, the
Trade Creditor’s accounts are adjusted.
General
Ledger transaction-file: A
transaction is posted for each transaction line.